Drag the EDQ Phone Validation component from the Custom – Managed dropdown (on the left) and drop into the Details standard component (middle box) or component of your choice.
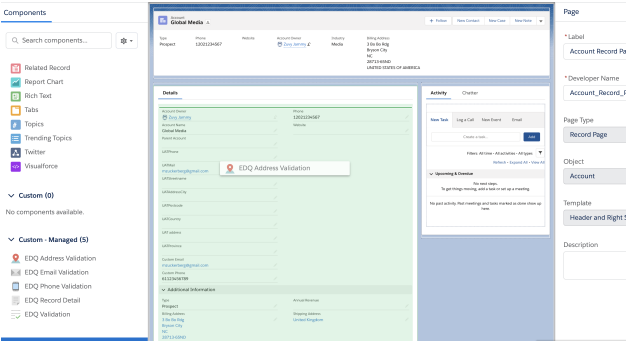
Configure options on the right:
Click Save.
Activate page
Click Back (Salesforce button).
Component error
When validating a phone number, our Phone Validation API returns both the phone number with international country calling code and a formatted phone number in the specified format. Possible format options are E164, PLUS_E164, NATIONAL or any 3-letter ISO country code. If not specified, the NATIONAL format is used.
If you want to use the formatted phone number in one of the possible formats, you must enable a config setting. This setting is called Use formatted phone number and can be enabled by following the instructions on our Configure global settings page. Once enabled you can also use the Phone number output format free text setting to specify the format.
Examples to show how the output format affects the formatted number returned for the input 1 (888) 727-8822:
| output_format | validated_phone_number | formatted_phone_number |
|---|---|---|
| E164 | 18887278822 | 18887278822 |
| PLUS_E164 | 18887278822 | +18887278822 |
| NATIONAL | 18887278822 | (888) 727-8822 |
| USA | 18887278822 | 1 (888) 727-8822 |
If the phone code plus sign setting is enabled, as described below, a plus sign will only be added if the output format chosen is not PLUS_E164, as this already includes it in the formatted number.
Potential for invalid international numbers
If our EDQ components are used to validate a phone number or if the existing number in your database was entered manually with a plus sign (+), our component will display the plus sign (+) when your object is in view mode.
Default behavior
If you want to always retain the plus sign (+) when saving phone numbers, you must enable a config setting. This setting is called Enable phone code plus signs and can be enabled by following the instructions on our Configure global settings page.
Due to a few regional limitations, the live status for either Mobiles, or Landlines, may not be supported with the standard Phone Validation service, but it is possible to include an additional request parameter to ensure the confidence level returned is as accurate as possible for the countries which support it. More information on this feature can be found in our Phone Validation API documentation, but you can enable this feature in our Salesforce integration by configuring the global settings.
Costs
