Which EDQ components are supported?
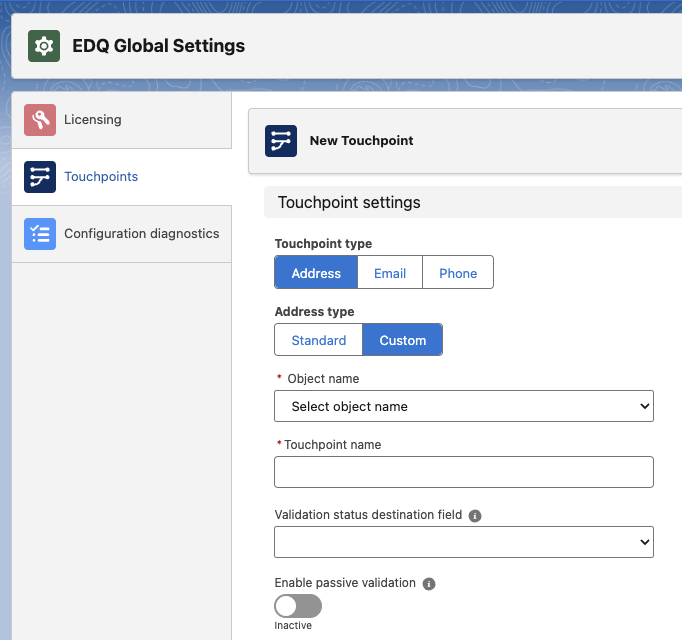
If you're using the EDQ Record Detail component to validate addresses and your Salesforce object uses regular custom fields to store the address rather than employing standard Salesforce Address fields (including the new Custom Address Field), you will need to carry out some additional configuration to enable address validation of these fields. This is achieved through configuration of Touchpoints.
Click on App Launcher. Type EDQ Global Settings in the Quick Find box, and select it.
Select Touchpoints from the left-hand menu.
Click the New button found in the top right to create a new Touchpoint configuration for your Salesforce object.

Set the Touchpoint type to Address and the Address type to Custom then select your Salesforce object from the dropdown.
Set the optional destination field for the validation status. By default the validation status is stored in a separate EDQ Log object, which happens in a trigger after the object is saved. If action needs to be taken based on the validation status before saving, then we offer the option of storing the status in a destination field on the record itself. Refer to the EDQ Log custom object guide for details on the possible status values.
Mapped field must be modifiable
Give your Touchpoint a useful name to help identify it in the list.
Activate the optional Passive validation feature should you wish to use it.
You can then map each address element to a custom field of your choice.
Custom picklist values
Depending on the number of street custom fields used, the address lines in our API response will be applied in different ways and make use of the concatenation separator configured in the global settings:
In order for the custom fields configured in a Touchpoint to be transformed into a set of EDQ validated address fields on the page, all of the custom fields must be present in the Page Layout. If any fields are missing from the Page Layout the Touchpoint will fail to initialize and the EDQ Record Detail component will fall back to displaying the standard Salesforce fields. In addition, an error message will be displayed in the browser console indicating that this has happened and what field(s) are missing. Here is an example:
