This is an optional configuration step and only applies if you intend to use EDQ components on an Experience Cloud website for authenticated external users or with Public Access enabled, which allows guest users to see and interact with the site without logging in.
Below we detail the instructions for setting up permissions for a fictitious Experience Cloud site called Customer Account Portal so references to this will need to be adjusted for your own site name and profile.
Enhanced Profile User Interface
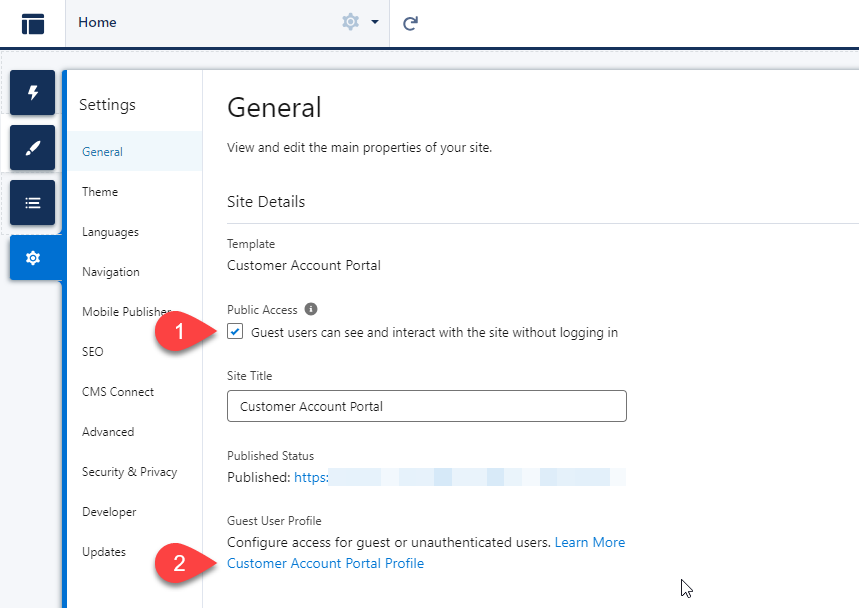
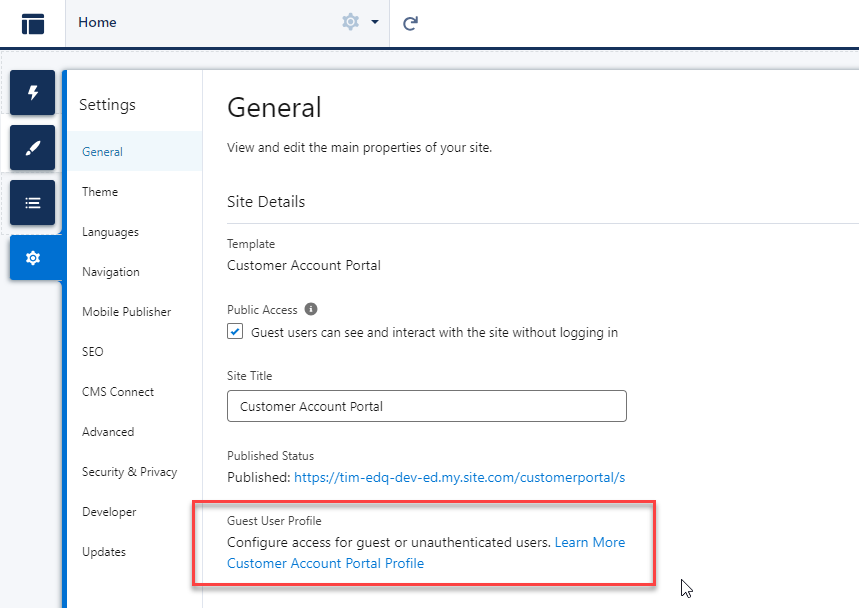
If you are setting things up for guest users you must navigate to the General tab of Settings for Experience Builder, enable Public Access and then click the name of the automatically created Guest User Profile in preparation for the next section.
The permission configuration will differ depending on the user type you need to configure, as detailed below:
External users must be granted access to the relevant EDQ objects. The most appropriate way to do this will be unique to your particular security configuration. Users can either be assigned to the EDQ Non-admin permission set or these same permissions can be manually applied to an existing profile. Further information on the the permissions required can be found on the assign permissions page.
Having already navigated to the Guest User Profile from the Experience Builder settings:
Click Object Settings.
Edit the following EDQ objects, setting the Object and Field permissions as indicated before clicking Save:
| Object | Object Permissions | Field Permissions |
|---|---|---|
| EDQ Error Logs | Enable Read and Create | Enable Read Access for all fields |
| EDQ Logs | Enable Read and Create | Enable Read Access for all fields |
| EDQ Profile Settings | Enable Read only | Enable Read Access for all fields |
| EDQ State Settings | Enable Read only | Enable Read Access for all fields |
| EDQ TouchPoints | Enable Read only | Enable Read Access for all fields |
Here's an example for the EDQ Error Logs object:

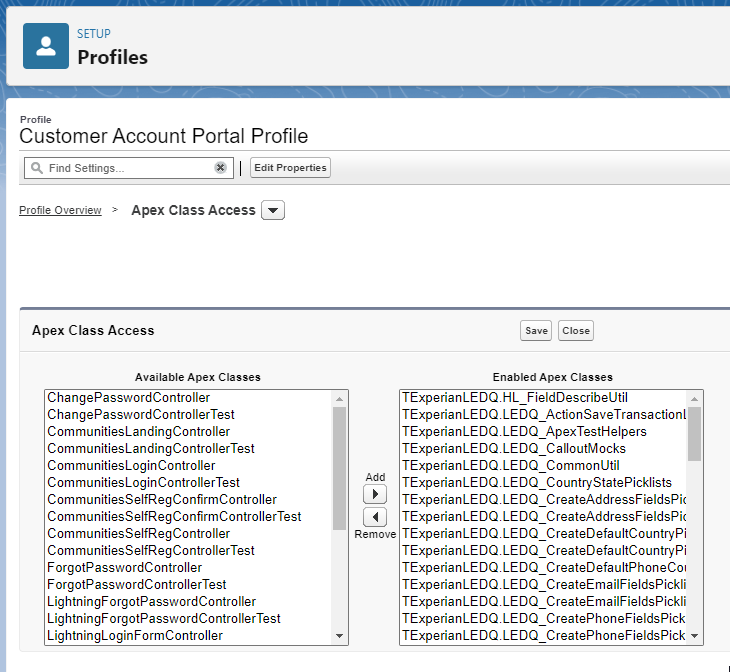
Return to the Profile Overview and click Apex Class Access.
Click Edit at the top of the Apex Class Access table.
Select all of the classes beginning with TExperianLEDQ, click Add and then Save.
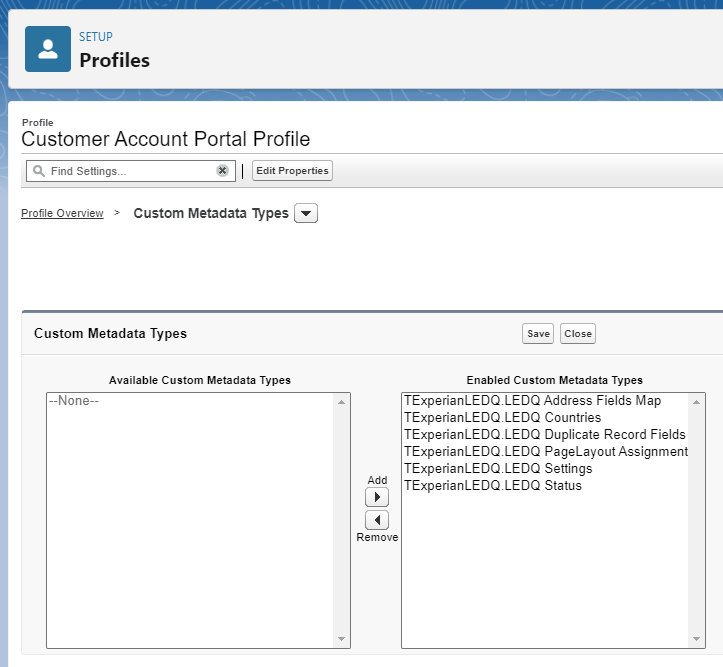
Return to the Profile Overview and click Custom Metadata Types.
Click Edit at the top of the Custom Metadata Types table.
Select all of the Custom Metadata Types beginning with TExperianLEDQ, click Add and then Save.
The Sharing Settings configuration will differ depending on the user type you need to configure, as detailed below:
Go to Setup, then type in Sharing Settings to the Quick Find box and select it.
Click Edit at the top of the Organization-Wide Defaults table.
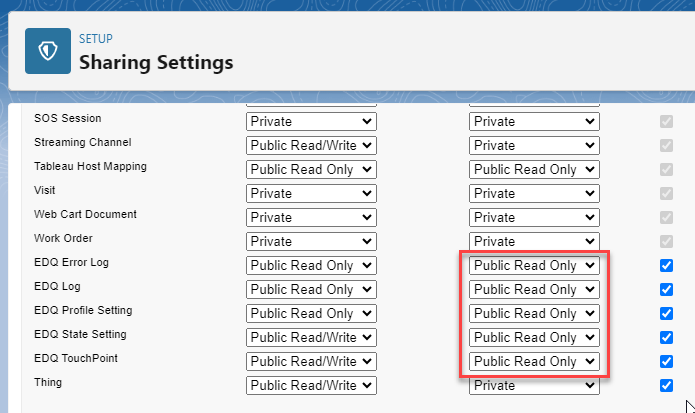
For the 5 EDQ objects change the Default External Access selection to Public Read Only and then Save.
Go to Setup, then type in Sharing Settings to the Quick Find box and select it.
Click Edit at the top of the Organization-Wide Defaults table.
For the 5 EDQ objects change the Default External Access selection to Public Read Only and then Save.
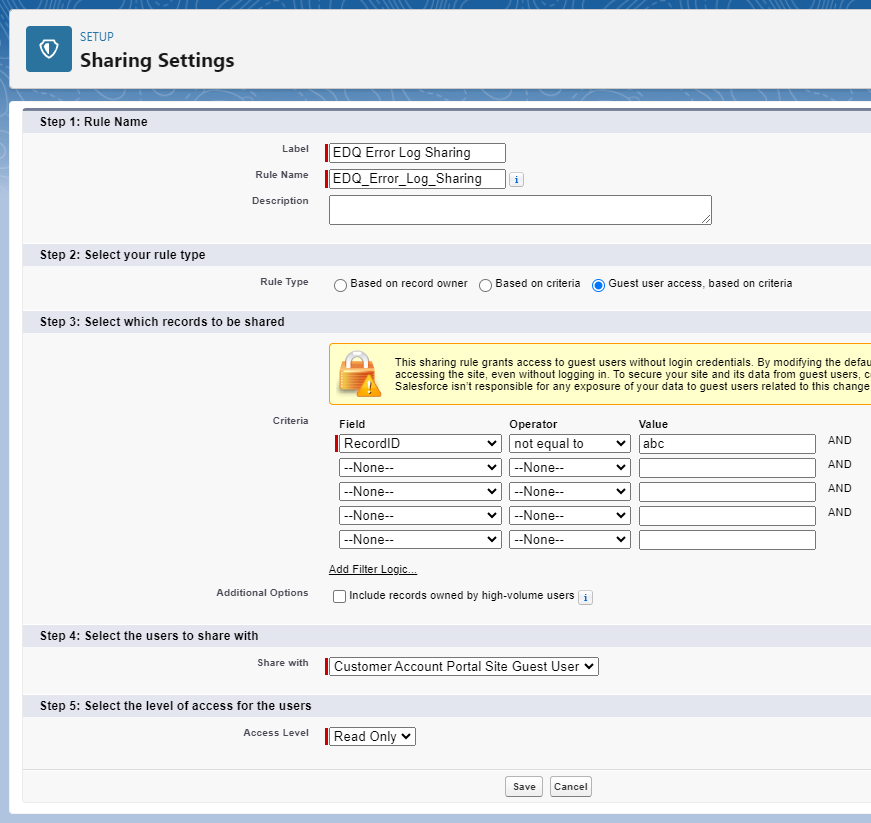
Scroll to the bottom of the Sharing Settings page and you will find Sharing Rules for each of the 5 EDQ objects.
For each one click New and configure the rule as follows:
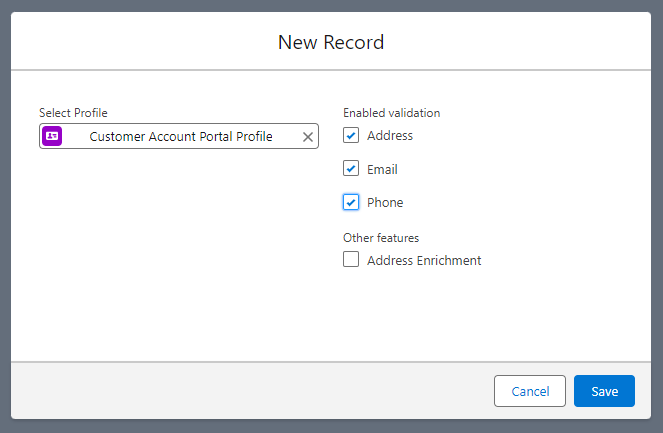
Go to App Launcher, then type EDQ Profile Settings in the search box and select it.
Click New.
Select the particular external user Profile or Guest User Profile for your Experience Cloud site in the look up field.
Select Address, Phone and/or Email under Enabled validation.
These steps will be necessary if your users requires access to a Flow containing EDQ components.
Go to Setup, then type in Flows to the Quick Find box and select it.
Click the down arrow to the very right of your chosen Flow and select Edit Access.

Click Override default behavior and restrict access to enabled profiles or permission sets and then Save.
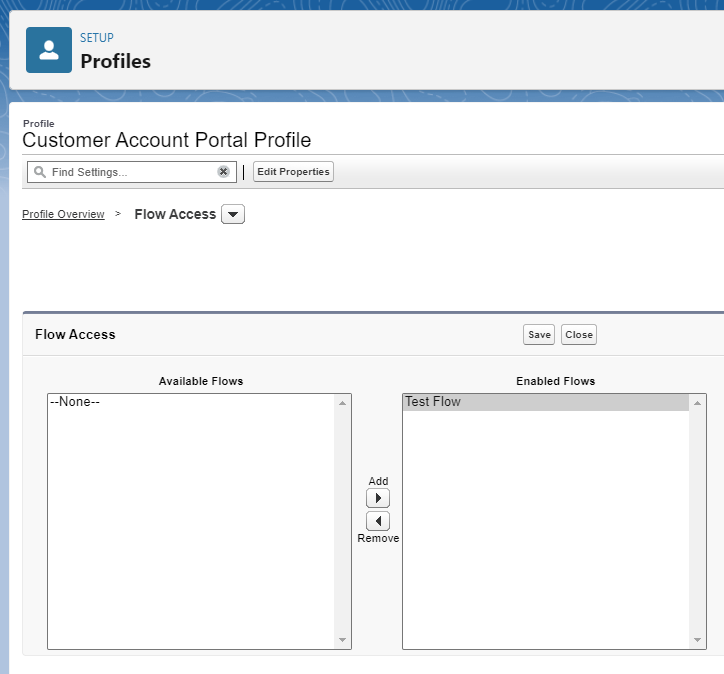
Navigate to your particular external user Profile, or to your Guest User Profile which is accessed via Experience Builder Settings.
Click Flow Access.
Click Edit at the top of the Flow Access table.
The flow whose access you just edited will have appeared in the list of Available Flows. Select this, click Add and then Save.
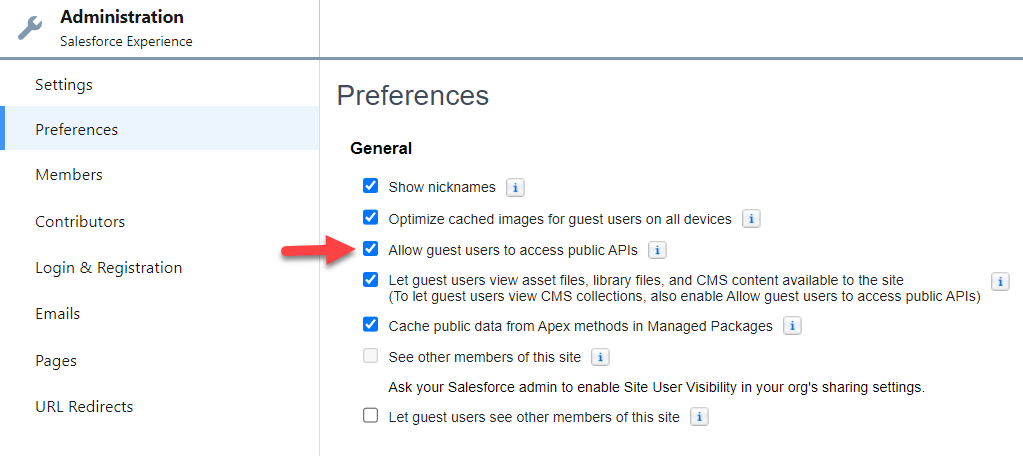
For Lightning Web Runtime (LWR) sites, return to Experience Builder and click Workspaces, then Administration.
Click Preferences and select Allow guest users to access public APIs before clicking Save.