To simplify the setup of an authenticated callout to the Salesforce Tooling API, we specify a named credential as the callout endpoint. We also create an external credential to specify the authentication protocol and permission set or profile to use when authenticating against the API.
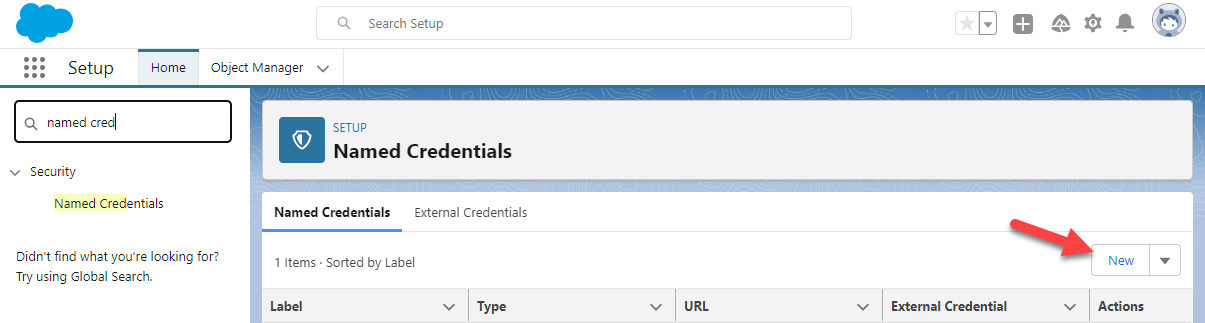
Go to Setup, then type in Named Credentials to the Quick Find box and select it.
First create an External Credential by navigating to that tab and clicking New on the right hand side.

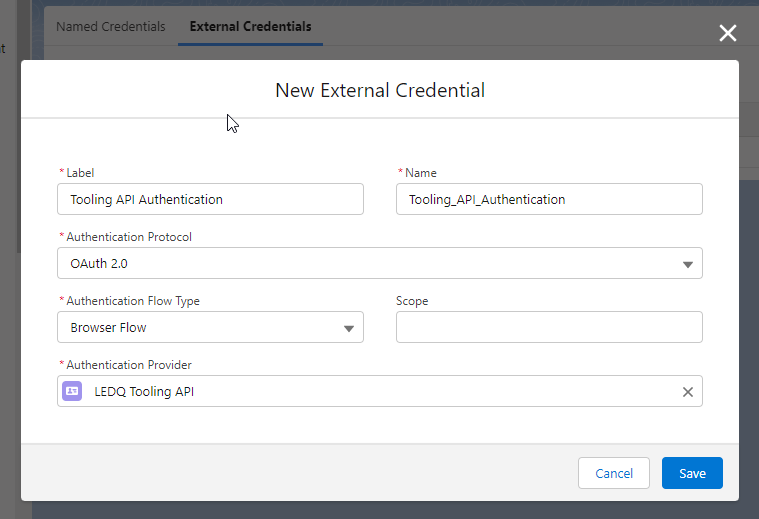
Fill in the following External Credential fields in the modal with these specifications:
| Field | Specification |
|---|---|
| Label | Tooling API Authentication |
| Name | Tooling_API_Authentication |
| Authentication Protocol | OAuth 2.0 |
| Authentication Flow Type | Select Browser Flow |
| Identity Provider | Select Auth Provider and then enter LEDQ Tooling API |
Click Save.
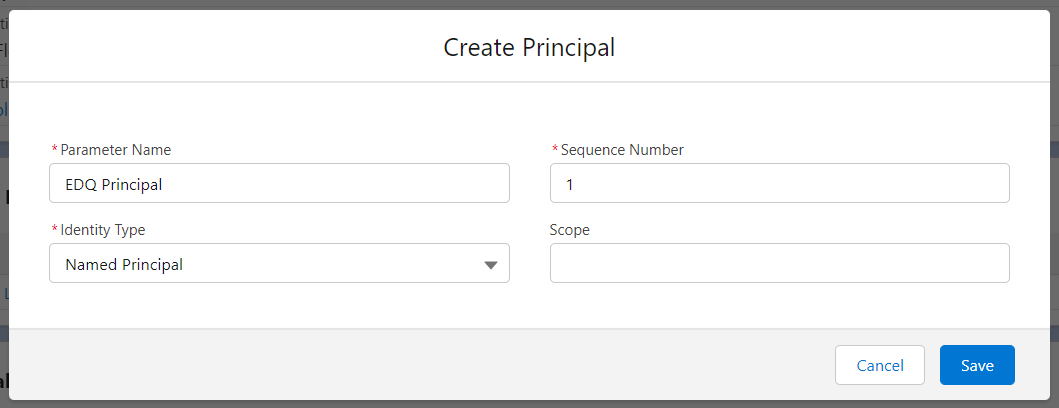
Scroll to Principals and click New to create a principal for this external credential with the following specifications:
| Field | Specification |
|---|---|
| Parameter Name | EDQ Principal |
| Sequence Number | Assign a sequence number. A sequence number specifies the order of principals to apply when a user participates in more than one principal. For example, a user could be part of multiple permission sets that are applicable for a credential provider. Priority is from lower to higher numbers. If unsure, just use 1. |
| Identity Type | Choose either Named Principal or Per-User Principal. You can set up each external credential to use an org-wide named principal or per-user authentication. A named principal applies the same credential or authentication configuration for the entire org, while per-user authentication provides access control at the individual user level. We recommend Named Principal. |
Click Save to save the principal.
If you've set the Identity Type as Named Principal as suggested, then select Authenticate from the principal’s Actions menu. Authenticate yourself to the system.
Authentication errors
You will then log in and and agree to allow Experian LEDQ the access it requires. If authentication is successful you will be redirected back to the External Credentials page and the principal will have an Authentication Status of Configured.

You can map a principal to multiple permission sets, permission set groups, or profiles. We detail the steps for the EDQ User External Credentials permission set created when you followed the steps earlier on the assigning permissions page, but you may want to configure things differently based on your own org configuration. Further details can be found within the Salesforce Documentation.
Go to the Setup screen and type Permission Sets in the Quick Find box and select it.
Select the EDQ User External Credentials permission set.
Click External Credential Principal Access in the Apps section.
Click Edit.
Select Tooling_API_Authentication - EDQ Principal in the left column and click the Add arrow to move it into the Enabled column.
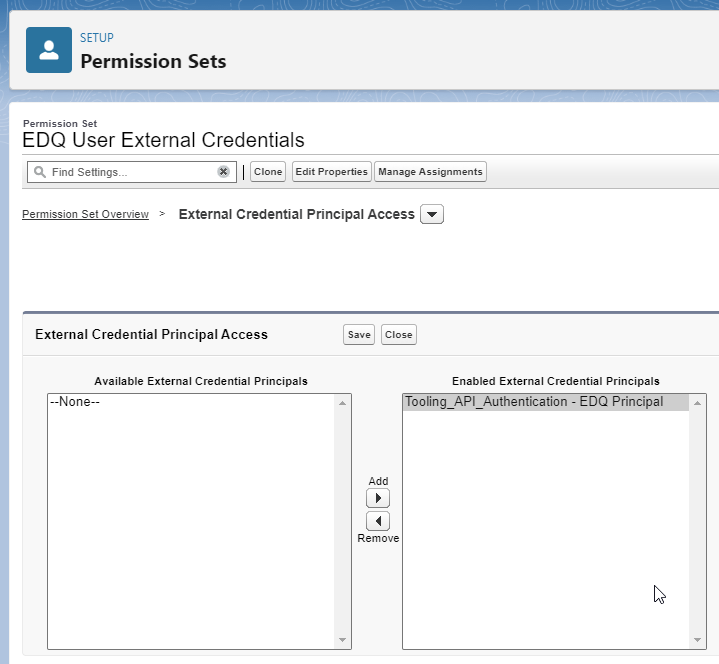
Click Save.
Click Manage Assignments and add an assignment for all users who will be interacting with EDQ components, both system administrators and standard users.
All users need External Credential Principal Access
Go to the Setup screen and type Named Credentials in the Quick Find box and select it.
Click New on the right hand side.
Fill in the following Named Credential fields in the modal with these specifications:
| Field | Specification |
| Basic | |
| Label | Tooling API Layouts |
| Name | Tooling_API_Layouts |
| URL | Use just the protocol and domain portion of the Callback URL provided from the Auth. Provider detail screen. Copy only up until the first / after the domain, e.g. https://example-domain.my.salesforce.com |
| Enabled for Callouts | Toggled on |
| Authentication | |
| External Credential | Select Tooling API Authentication |
| Callout Options | |
| Generate Authorization Header | Checked |
| Managed Package Access | |
| Allowed Namespaces for Callouts | TExperianLEDQ |
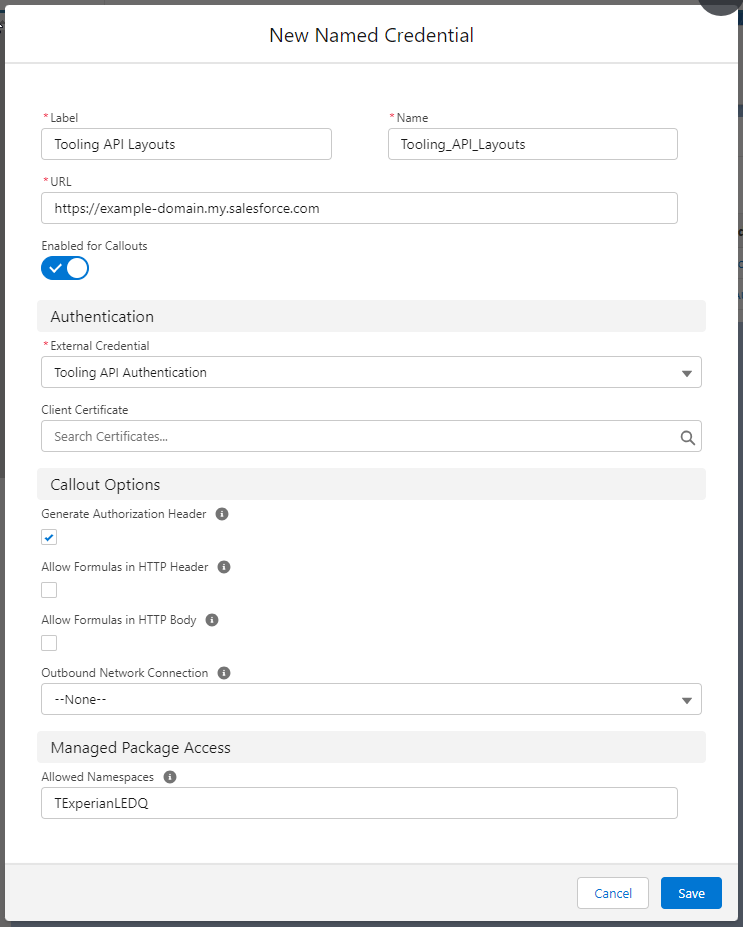
Click Save.
