Salesforce Screen Flows provide a way to guide users through a business process. They provide instructions or call scripts, prompt users to complete certain fields, and then perform actions behind the scenes such as Record Create or Record Update. Your users will move through a series of screens that you have created, all without you having to write a single line of code.
We offer three EDQ components that can be used to provide contact data validation when building a Screen Flow:
If you wish to create records using the validated contact data and you want those records to show the validation status against each component, we also provide a dedicated Apex Action for use within your flows to create the necessary transaction logs which are tied to the record.
Additionally, you can use an Unbound Touchpoint with our Flows components. This will enable you to enrich your address with a variety of additional data. For example, you can find out a household's estimated income level or an address's geographical coordinates. Note that for addresses your authentication token must be licensed for the Enrichment dataset(s) you intend to use.
The steps below outline the basic process to create a Screen Flow which validates your chosen contact data, creates a new record using that data and then creates the transaction log to store the validation status. The subsequent pages will explore some of these steps in more detail.
Open Flows from within Setup and click New Flow.
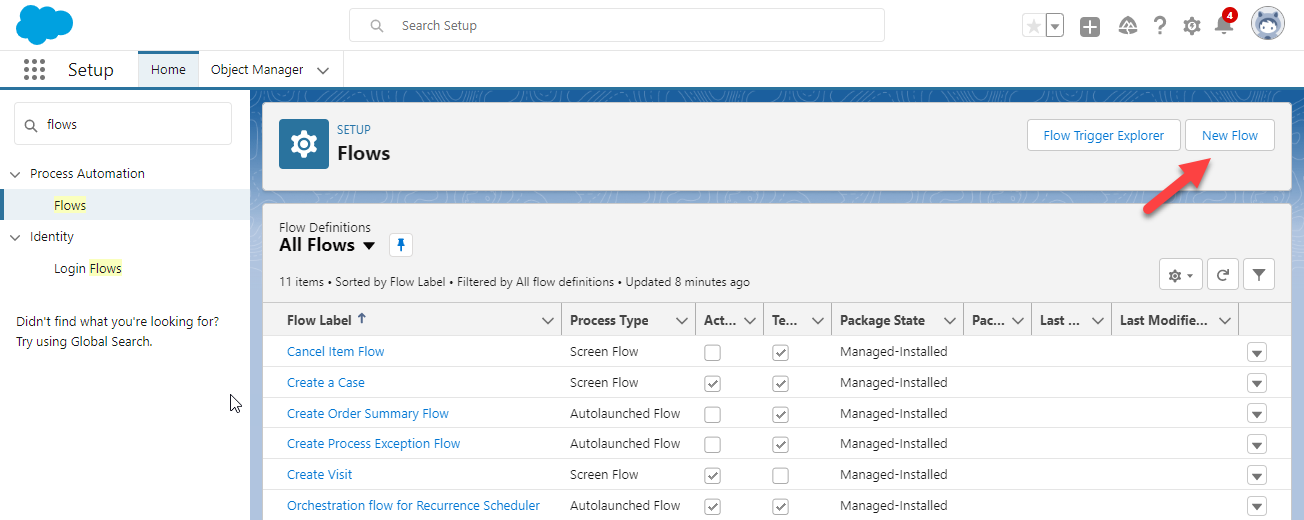
Select Screen Flow and click Create.

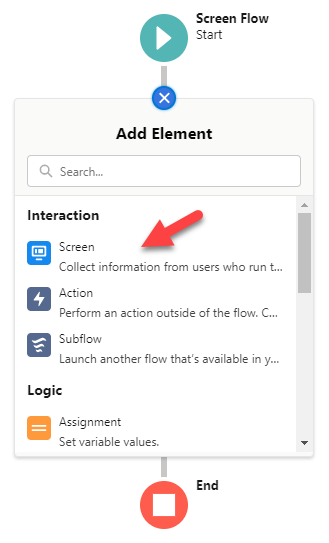
Click the + icon beneath the Start step and add a new Screen element.
Give the Screen a Label and the API Name will be populated automatically.
From the Components panel on the left, click and drag the required EDQ component, then drop it on the screen.
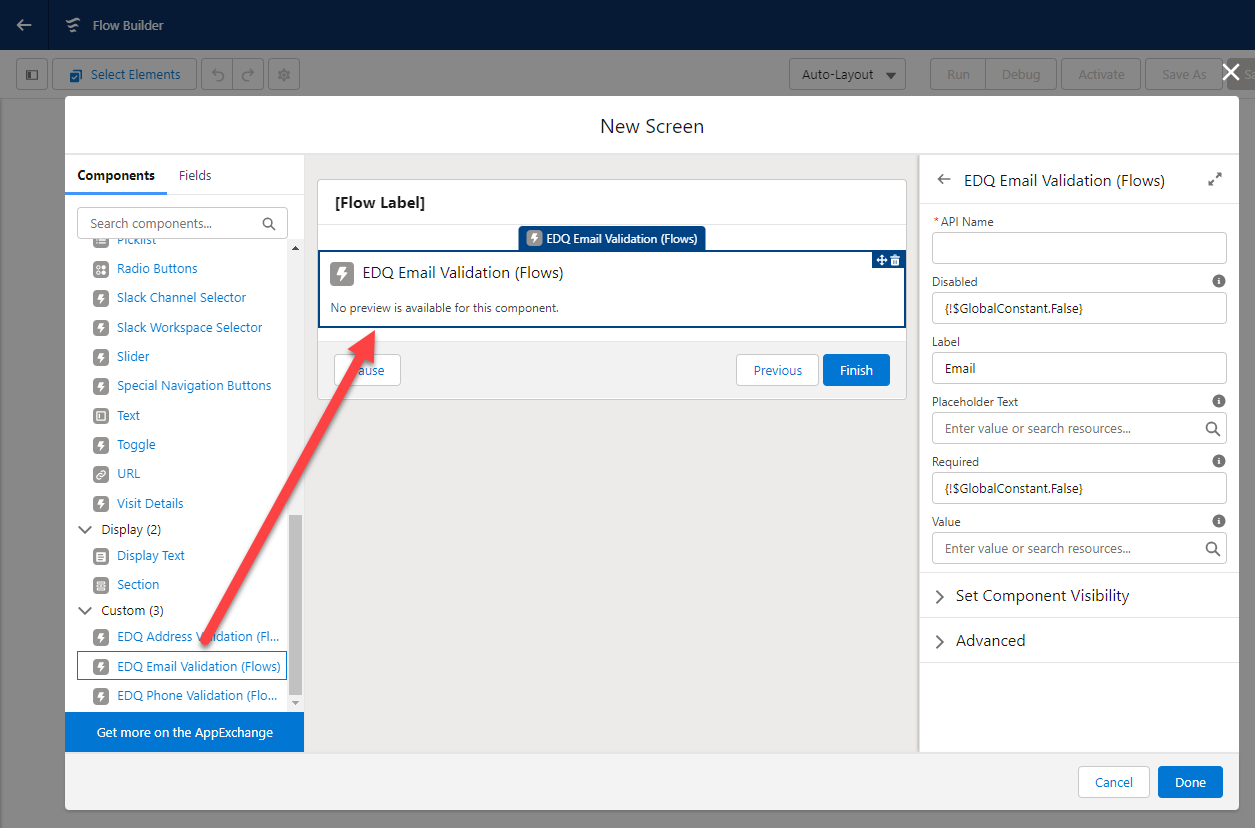
Configure the EDQ component as described on the subsequent pages of this guide and click Done.
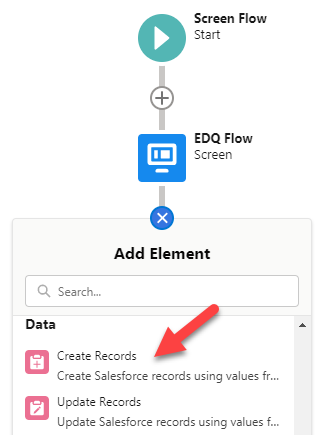
Click the + icon beneath the new Screen element and add a Create Records element.
Configure the Create Records element as described on the subsequent pages of this guide and click Done.
Click the + icon beneath the new Create Records element and add an Action element.
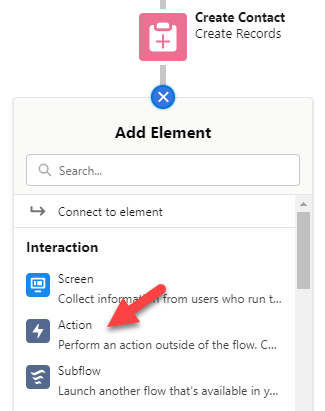
Configure the Action element as described on the subsequent pages of this guide and click Done.
Your basic flow is complete. Save the flow and it can then be used within your Salesforce org as you require.
The multitude of ways in which Salesforce Flows can be configured is outside the scope of this guide. The basic setup above is a very simple example of creating a single new record with validated contact data, but this should provide the building blocks to include contact data validation in any automated business process.
However, we do offer details on how to configure an Unbound Touchpoint and use it in our Flows components. This will enable you to enrich your addresses, emails and phone numbers with a variety of additional data.
