Validation statuses on newly created records will not show up unless an EDQ (Transaction) Log object is created and associated with each one. This tells the EDQ system what the validation statuses were for each EDQ validated field on each record. To achieve this we have a dedicated Apex Action to create the necessary EDQ Log objects. You will need one for each EDQ validated field within the records that you create inside your Flow.
Here are the steps for configuring an Apex Action, using Email and the Contact object as an example.
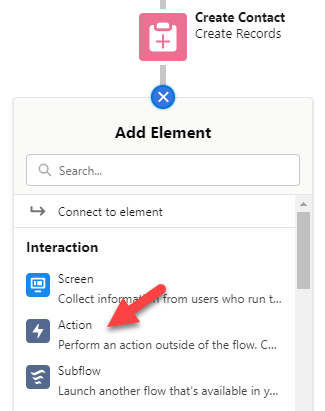
Click the + icon beneath the Create Records element of your Flow and add an Action element.
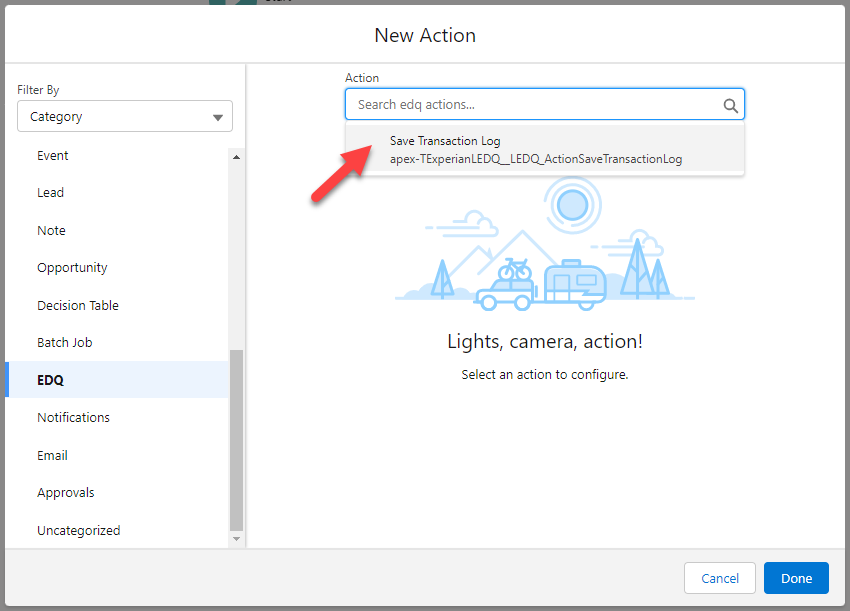
Choose the EDQ category from the left-hand menu.
Click the Action picker on the right-hand side and select the Save Transaction Log action that appears.
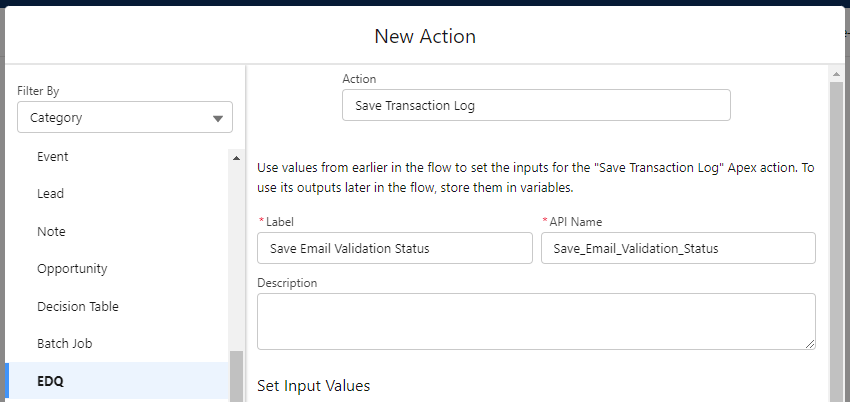
Give the Action element a Label and the API Name will be populated automatically.
Map the inputs of the EDQ (Transaction) Log object to the output fields of your EDQ Flow component:
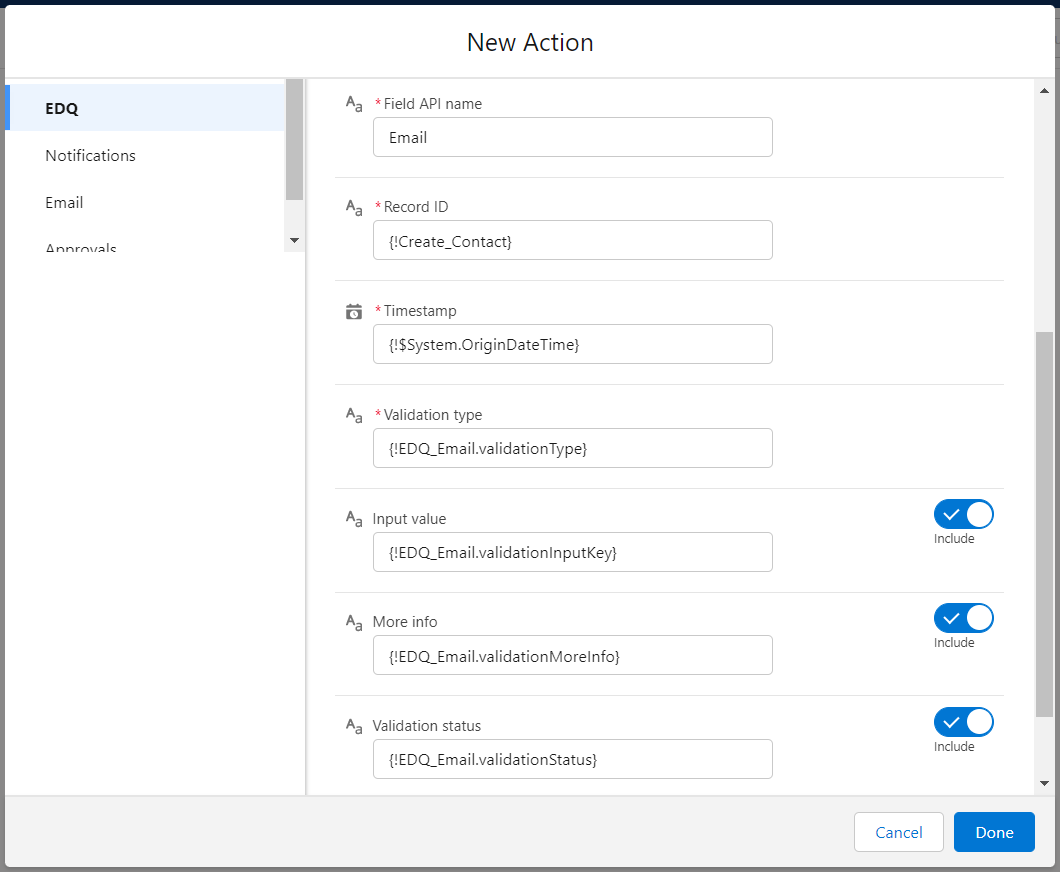
Field API name: For Email and Phone, this will just be the API name of your validated field. For Address, this will be the name of your first street field, for example BillingStreet or ShippingStreet for standard address fields, or Custom_Street1_Field__c for a custom field.
Record ID: The ID of the record you are creating an EDQ (Transaction) Log against. You can get this from the step that created the record, for example VARIABLES -> ContactId from [step name].
Timestamp: The timestamp which records when the field was validated. You can take this from Global Variables -> $System -> OriginDateTime, or any other DateTime field from elsewhere in your flow.
Validation type: Map to the validationType output of your EDQ Flow component.
Input value: Enable this using the switch on the right and map to the validationInputKey output of your EDQ Flow component.
More info: Enable this using the switch on the right and map to the validationMoreInfo output of your EDQ Flow component.
Validation status: Enable this using the switch on the right and map to the validationStatus output of your EDQ Flow component.
Click Done to save the Action.
Repeat these steps as necessary for other EDQ validated fields you may have in your flow.
