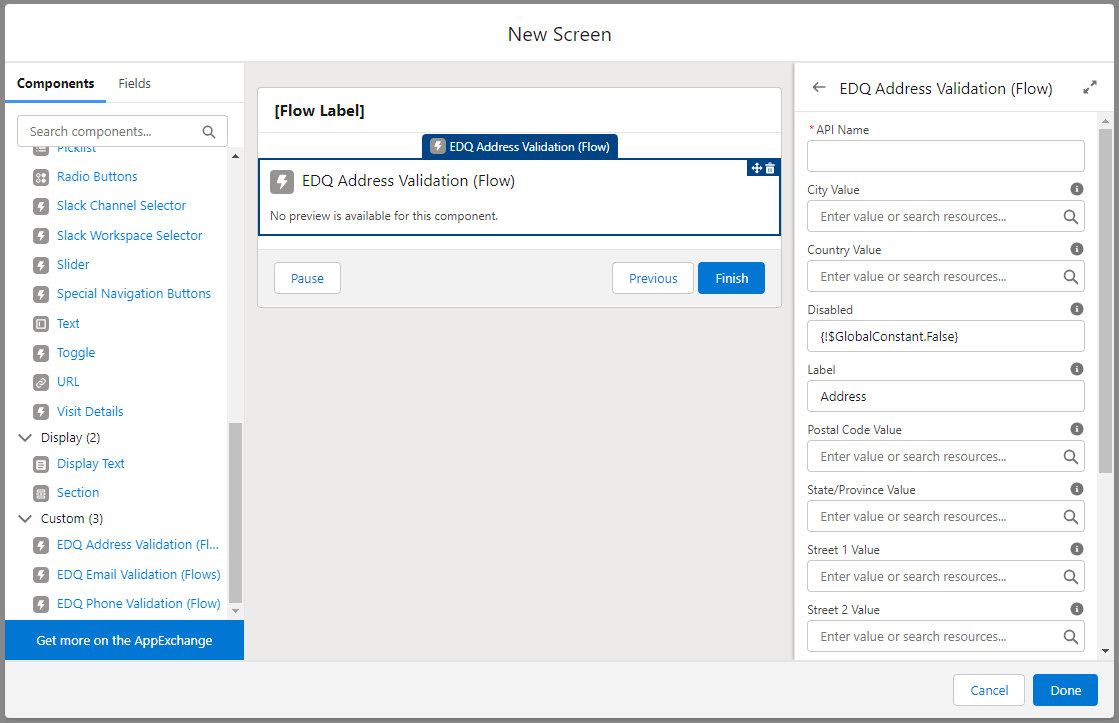
To include a validated address in your Screen Flow simply click and drag the EDQ Address Validation (Flows) component found under the Custom section of the Components panel into the required position on your screen.
You can select resources from the flow, such as variables or global constants, or you can manually enter a value.
Attribute |
Description |
|---|---|
| API Name | An API name can include underscores and alphanumeric characters without spaces. It must begin with a letter and can’t end with an underscore. It also can’t have two consecutive underscores. |
| City Value | Can be used to optionally provide a default value for the City field. |
| Country Value | Can be used to optionally provide a default value for the Country field. |
| Disabled | Prevents the user from modifying or copying the values. Defaults to False and can be changed by using the appropriate GlobalConstant. |
| Existing Field API Name | Can be used in tandem with the Record Id below to optionally retrieve an existing EDQ Log entry so that the validated address and its status can be displayed when the component loads. This corresponds to the Salesforce API Name of the field the existing address is stored in. |
| Existing Record Id | Can be used in tandem with the Field API Name above to optionally retrieve an existing EDQ Log entry so that the validated address and its status can be displayed when the component loads. This corresponds to the Salesforce Record Id of the existing record containing the address. |
| Help Text | Give your users more context. The text you enter is available in an info bubble next to the component. |
| Label | User-friendly text that displays to the left of the component. |
| Postal Code Value | Can be used to optionally provide a default value for the ZIP/Postal Code field. |
| Required | If enabled, the Street and Country fields are made mandatory. Defaults to False and can be changed by using the appropriate GlobalConstant. |
| Restrict Countries To | A comma-separated list of country ISO codes representing the countries that should appear in the country dropdown for this instance of the component, e.g. AUS,GBR,USA. |
| State/Province Value | Can be used to optionally provide a default value for the State/Province field. |
| Street 1 Value | Can be used to optionally provide a default value for the Street 1 field. |
| Street 2 Value | Can be used to optionally provide a default value for the Street 2 field. |
| Street 3 Value | Can be used to optionally provide a default value for the Street 3 field. |
| Touchpoint API name | The configured API name for an Unbound Touchpoint used to enrich your flow with additional enrichment data, metadata or components for the address. |
| Use Split Street Field | The street results will be split into the separate Street fields if this option is enabled. The default is for them to be concatenated in the first Street field. Defaults to False and can be changed by using the appropriate GlobalConstant. |
| Use State Picklists | The active states configured in State and Country Picklists will be displayed as a picklist if this option is enabled. The default is plain text display of the state. Defaults to False and can be changed by using the appropriate GlobalConstant. |
You may wish for the component to load already populated with existing data. This could be data that hasn't previously been validated using EDQ components or it may have already been validated and you want to show the existing validation status beside the field. You should therefore note how the behavior changes depending on which flow input variables are set.
Flow variables set |
Outcome |
|---|---|
| Country Code Address Value fields |
|
| Existing Record Id Existing Field API Name |
|
| Existing Record Id Existing Field API Name Address Value fields |
|
All attributes are available to store in flow variables, but usually you must store one of these attributes below. The values are assigned to the flow variables when the user navigates to the next screen.
Attribute |
Description |
|---|---|
| City Value | The validated City. |
| Country Value | The validated Country. |
| Global Address Key | The Global Address Key for the validated address which can be used to retrieve data from our Enrichment API using the Salesforce HTTP Callout action. |
| Postal Code Value | The validated ZIP/Postal Code. |
| State Code | The validated State Code, which is required when using the Create or Update Records screen elements with a Custom Address Field. |
| State/Province Value | The validated State/Province. |
| Street 1 Value | The first line of the validated Street. |
| Street 2 Value | If using the Use Split Street Field option, the second line of the validated Street. |
| Street 3 Value | If using the Use Split Street Field option, the third line of the validated Street. |
| Three-letter Country Code | The three-letter code for the validated Country. |
| Two-letter Country Code | The two-letter code for the validated Country, which is required when using the Create or Update Records screen elements with a Custom Address Field. |
| Validation Input Key * | Used in the EDQ Save Transaction Log Apex Action if required. |
| Validation Mapped Fields | A mappings object containing the additional enrichment data, metadata or components configured in the Unbound Touchpoint specified in the input variable Touchpoint API name. |
| Validation More Info * | Used in the EDQ Save Transaction Log Apex Action if required. |
| Validation Status * | Used in the EDQ Save Transaction Log Apex Action if required. |
| Validation Type * | Used in the EDQ Save Transaction Log Apex Action if required. |
* The four asterisked Validation attributes are all needed if you use the dedicated Apex Action we supply to create EDQ Log objects to store the validation status.
