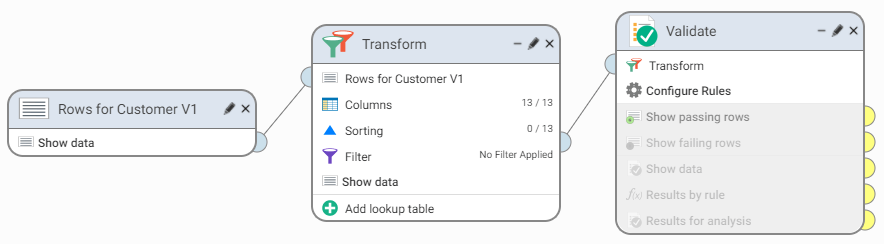
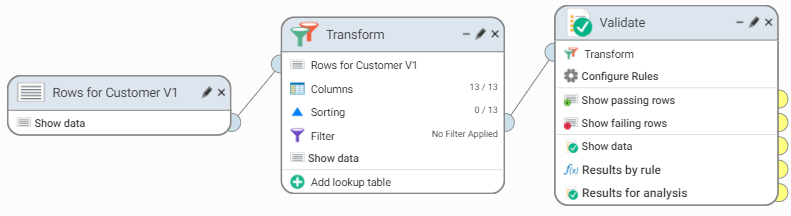
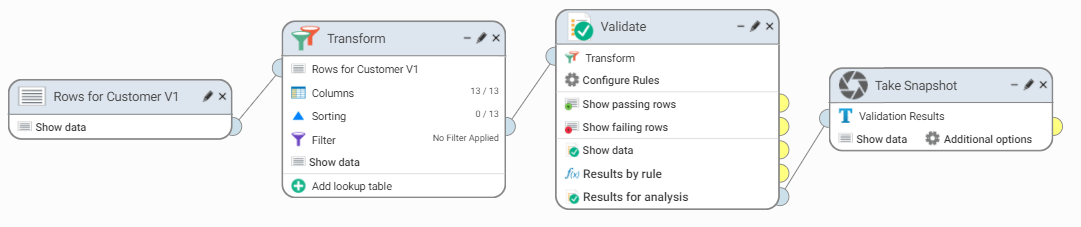
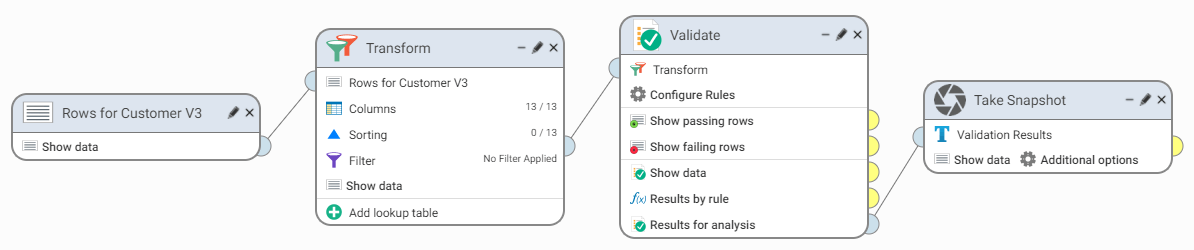
I want to see how the quality of my customers' data changes over time.
Create a snapshot of data and analyze the trends.
 (this will change the value to
  ).
).


To see other metrics (such as passed rows), click on Failed Rows and select the required one. To view results as a chart, click Show Chart.
I want to combine several data sources into one to have a global view of my customers' data.
Combine data from three source files containing customer information (contact/order details) based on the customer ID and order number.
The following sample data files are available in Data Studio:
 to see the suggested joins. Only exact column name matches will be suggested.
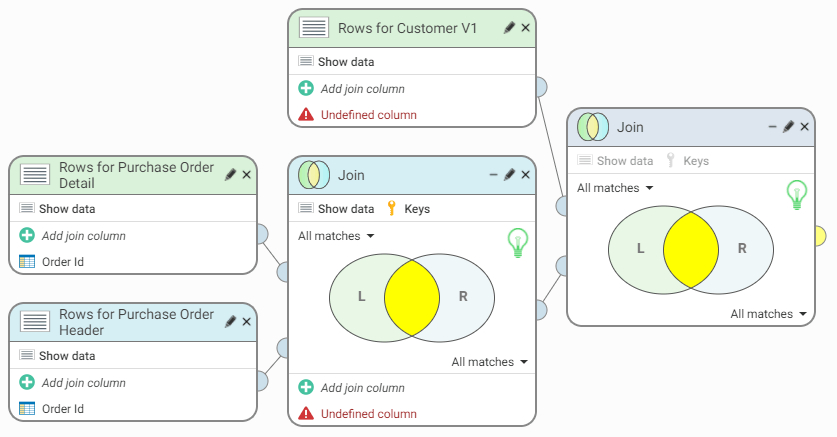 to see the suggested joins.
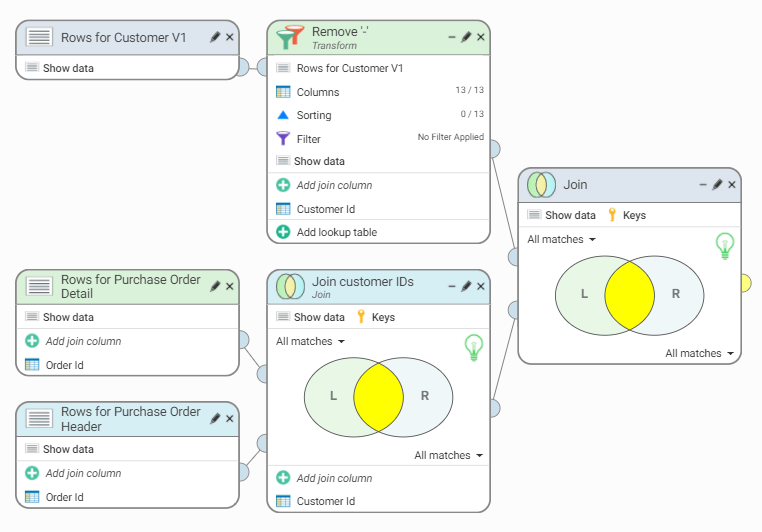
You can also change the title of each step and give it a more descriptive name. For example: double-click on the Transform title, type in Remove '-' and press enter; rename the first Join step to say 'Join customer IDs':
I want my new marketing campaign to only target customers with deliverable postal and email addresses.
Validate customer addresses and emails, clean them and remove duplicate records.
One of the benefits of having your data tagged is to allow the Workflow Designer to apply intelligent defaults in your workflow steps, significantly speeding up workflow creation.
You can set up auto-tagging if you would like Data Studio to automatically detect columns containing names, addresses, and other customer-related data within a file. You can also easily train the system to recognize types of data that are specific to your organization (or not yet included in Data Studio's knowledge base).
To find out more about auto-tagging and how to enable it, head to this page.
Alternatively, you may choose to tag your data manually, using the following steps.
In Data Explorer, click Sample Data Source.
Right-click on either the AUS Find Duplicates Sample.csv, GBR Find Duplicates Sample.csv, or USA Find Duplicates Sample.csv (depending on what country you would like to work with) and select Preview and configure.
Open the Headings tab.
Click Multi select.
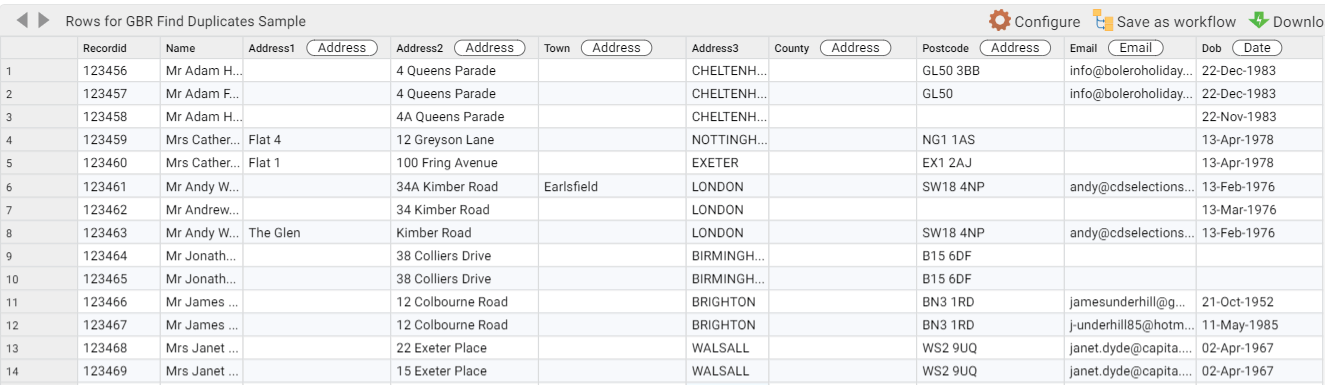
Select the following headings: Address1, Address2, Address3, Town, County and Postcode.
Right-click and select Tag columns. Click Yes to confirm that you want to tag multiple headings.
Click Edit. Under System, select Address then click Tag.
Tag the remaining headings one by one by right-clicking and selecting Tag column:
| Heading | Tag |
|---|---|
| Name | Name |
| Town | Locality |
| County | Province |
| Postcode | Postal Code |
| Dob | Date |
Click Apply in the top menu to save changes.
Here's an example of tagged columns:
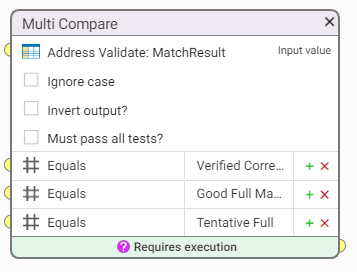
The workflow will validate postal addresses and emails and then remove duplicate records.
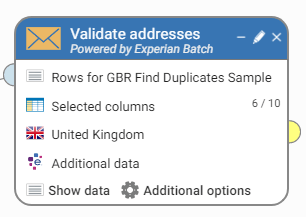
 to confirm.
An example of a correctly configured Validate Address step (for GBR):
Filter out unwanted rows:
Tidy up results:
Drag the Transform step and connect it to the Show passing rows node in the Split step.
Click Columns.
Click Multi select.
Select Address1, Address2, Address3, Town, County and Postcode then right-click and Hide. Click Yes to confirm.
Tag validated address columns below, one at a time. Right-click on the column, select Tag column then Edit to add a tag:
| Column | Tag |
|---|---|
| Address Validate: addressLine1 | Address |
| Address Validate: addressLine2 | Address |
| Address Validate: addressLine3 | Address |
| Address Validate: locality | Locality |
| Address Validate: province | Province |
| Address Validate: postalCode | Postal Code |
| Address Validate: country | Country |
Click to save changes. The workflow should look like this:

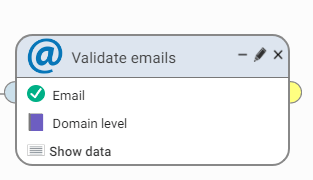
An example of a correctly configured Validate Email step:
Filter out unwanted rows:

Drag Find duplicates step and connect it to the Show passing rows in the Split step.
Select 'GBR_Individual_Default' blocking key.
Select the 'GBR_Individual_Default' ruleset and select GBR_Individual_Default.
Click Show data to start the matching process. Note that this might take a minute. Scroll to the right to see the match status results. Click Close when done.

Filter out unwanted rows:
to save changes.
To export all the remaining results, we need to combine them first.
The final workflow should look like this:

 (Click to expand)