Depending on whether you have the Salesforce State and Country/Territory Picklists feature enabled or not, will determine how you customise the state labels.
With picklists enabled
If you have the Salesforce State and Country/Territory Picklists feature enabled, you can customise the state labels by following the steps on our Picklist configuration page.
If you are using the Translation Workbench you can also change the State names here.
Go to the Setup screen and type Translation Workbench in the Quick Find box and select it.
Go to the Translate tab and select the language from the language dropdown.
In the Setup Component, select Address State.
Expand the Master State Label for the country you are editing.
Click in the Address State Translation and type in your customized State name.
You will then need to update the corresponding EDQ State Setting record so that its "Salesforce State Name" matches the value you have entered above. This is documented here under Changing state labels. Note: You do not need to edit the "State Name" in State and Country/Territory Picklists, just the EDQ State Setting record.
Disabling picklists
If you were to disable the State and Country/Territory Picklists feature, your customizations would no longer appear, and you would have to recreate them as detailed in the section below (otherwise the default labels will be used).
Your customizations will be saved and be reinstated if you were to enable picklists again.
With picklists disabled
If you have the Salesforce State and Country/Territory Picklists feature disabled, you can customize the State labels by following these steps:
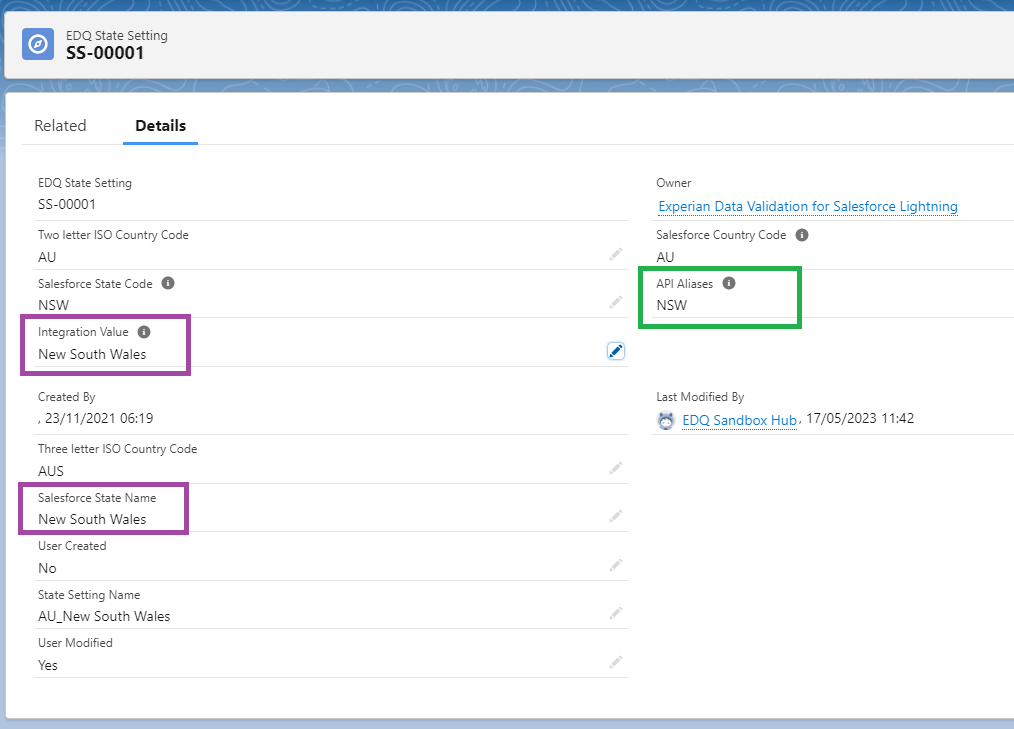
In the below example, the displayed name for NSW will be "New South Wales" as set by the values in the boxes.
Change the Integration Value and Salesforce State Name in the corresponding EDQ State Setting record to match:
Remember that the API Aliases field will need the value that comes back from the API if this is different from the integration value.