We recommend you start by making a test call to see how the API works. To make your first API request you will need:
An email address you want to validate.
A license to use the product. Talk to your account manager or contact us to get a license if you don't have one.
Your token, which confirms you are licensed to use Email Validation and authenticates each request you send to the API. This article explains tokens and includes instructions on where to find yours.
A tool that allows you to make API calls.
There are many different ways to make API requests, we provide two ways of doing that with the API by either using our sample Swagger integration or Postman collection.
To use the API from this page:
Go to API specification and click the POST block and then the Try it out button in the upper-right corner.
Enter your token in the Auth-Token field.
(Optional) Enter an identifier in the Reference-Id field.
(Optional) Enter a value between 3 to 15 in the Timeout-Seconds field.
(Optional) Enter a true or false in the Add-Metadata field.
(Optional) Under the Request body, you are able to change the email value with an email address of your choice. Note that the email value must be enclosed in quotation marks, e.g. "support@experian.com".
Click the Execute button to send the request to the API.
View the response returned by the API under Responses > Server response.
The information under Responses > Responses are examples only. Your request was successful if the API returned 200 - Success. Check out the possible response status codes to find out more.
This API comes supplied with a Postman collection. Postman is a free, easy-to-use third-party application you can use to send API calls.
Follow these steps to send requests to the API via Postman:
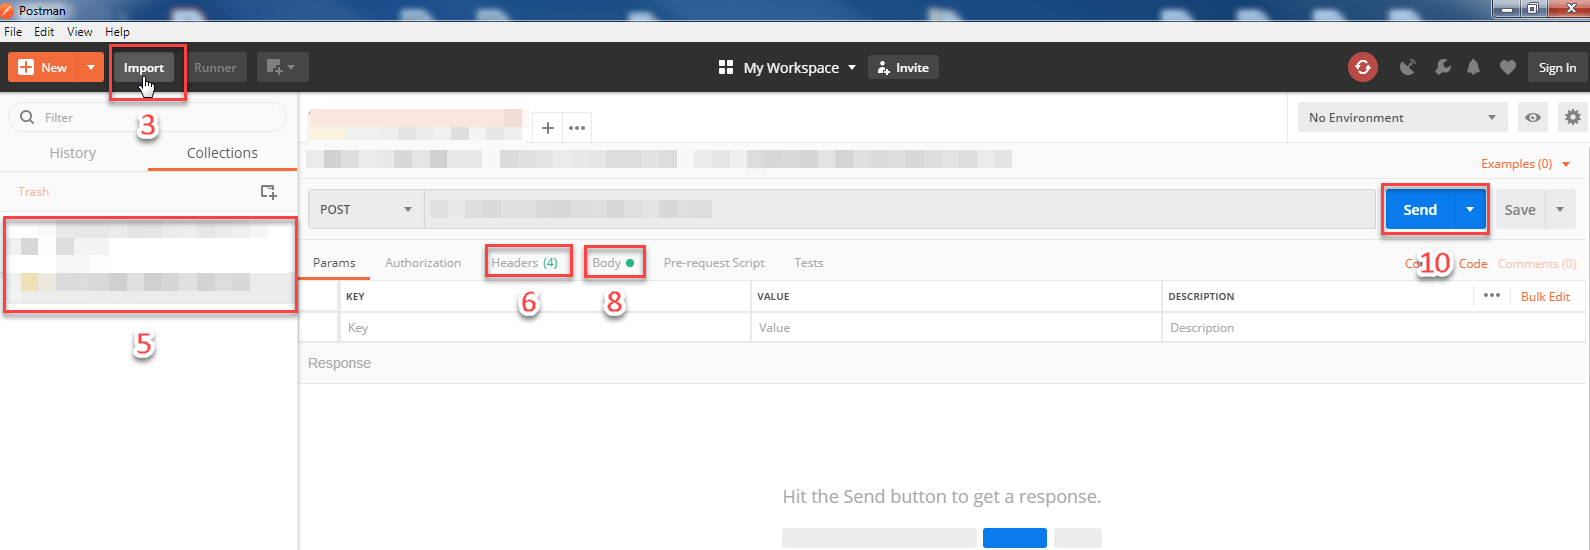
Open the Postman app and click the Import button in the upper-left corner.
Import the file you've downloaded and unzipped.
Go to the Collections tab on the left-hand side panel and click the API request you want to test.
Go to the Headers tab.
Replace the {{Auth-Token}} value with your token.
(Optional) Replace Timeout-Seconds header value with a number between 3 and 15. Alternatively, you can skip this step and use the preset value.
(Optional) Set Add-Metadata header value with true or false. Alternatively, you can skip this step and use the preset/default value (true).
Go to the Body tab.
(Optional) Replace the email value with an email address of your choice. Note that the email value must be enclosed in quotation marks, e.g. "support@experian.com". Alternatively, you can skip this step and use the preset value.
Click the Send button to submit the API request.
View the response returned by the API. Note that your request was successful only if the API returned an HTTP status code of 200 - Success. Check out Response status codes to find out more about scenarios where the API returns errors.