home/Email validation/Email sample code/Get started/Integrating into your website

Integrating into your website

The Email Validate sample code is typically provided by the customer account manager or technical consultant assigned to assist you with your implementation. Contact them for any questions.

Integration notes

  • This walkthrough assumes that the Email Validate code resides in the same directory as the target page. If the code resides in a different directory, the paths can be adjusted. See Target Page Modifications for details.
  • If you are already using jQuery and jQuery UI, you can leave the reference to your corresponding JavaScript and CSS files in order to give the address layout the same style as the html page. If you do not already have jQuery UI implemented, you can modify the provided CSS to match your styling.

The integration consists of 3 steps: preparing the form, testing the functionality and integrating.

  1. Extract the sample code zip file to create new directories for the sample code, and documentation.
  2. Copy the contents of the extracted sample code directory to the main directory of the application you wish to integrate Pro Web with.

JSP is provided in the form of a war file which will need to be deployed as per the documentation of your Web Server.

  1. Open the email_proxy.aspx file. Search for the token string field and set the value to the security token that you are subscribed to.
  2. Once you have confirmed connectivity, open a web browser and navigate to qas_test.html within your application directory structure.
  3. Enter the information below and click Submit to validate the contact details. This confirms that the Email Validate functionality is working outside of your application.

Example

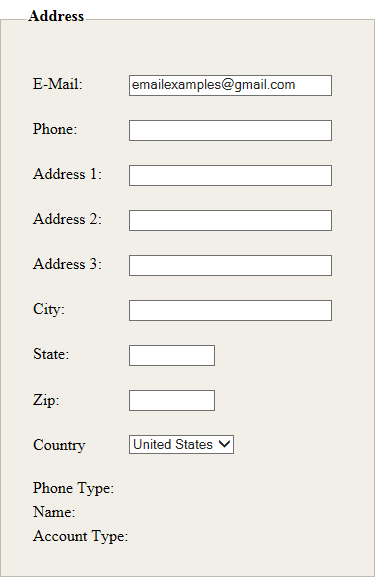
The validated e-mail should look similar to this:

Once all configuration and testing has been completed on the sample form, you can begin to work on integrating Email Validate into your application.

The qas_test.html contains the code that will need to be added to the target page. There are a small number of requirements that if followed should provide for an easy integration.

Validation function

QAS_Verify(): Call this to use the Email Validation service.

Target page modifications
  1. Include the following in the <head> section of your page:
<linkrel="stylesheet"type="text css"href="jquery/css/qas/jquery-ui-1.8.6.custom.css"></linkrel="stylesheet"type="text>
<linkrel="stylesheet"type="text css"href="qas.css"></linkrel="stylesheet"type="text>
<scripttype="text javascript"src="jquery/js/jquery-1.4.2.min.js">
<scripttype="text javascript"src="jquery/js/jquery-ui-1.8.6.custom.min.js">
<scripttype="text javascript"src="jquery/js/jquery.jsonp-2.4.0.js">
<scripttype="text javascript"="" src="jState.js">
<scripttype="text javascript"src="qasConfig.js">
<scripttype="text javascript"src="email.js">
Set `src` to the actual location of the file.
  1. If using a form, set the form to return false on submit, for example:
<form id="checkout" action="thankyou.aspx" method="post" onsubmit="return false;">
  1. Add the appropriate validation function to an onclick event tied to the data submission, for example
<input id="subButton" type="submit" value="Submit" onclick="return QAS_Verify()">
Changes to qasConfig.js
  1. Set IDs:

    1. Set EMAIL_FIELD_IDS to the id attributes of your target email fields.
    2. The delivered JavaScript file comes configured for three sets of contact information on a single form, but this can be modified for the appropriate number for your page simply by adding or removing an array of attributes from the ADDRESS_FIELD_IDS, COUNTRY_FIELD_IDS, EMAIL_FIELD_IDS or PHONE_FIELD_IDS.
  2. Set validation invocation options:

    1. preOnclick will call a function to be run just prior to address validation and will not proceed until true is passed back.
    2. postOnClick can trigger a function call after validation. It can also be used in the case that you are not using a form for submission.
    3. buttonID is used to submit your form. By using the button id of your submit button, the code will use this button to submit your form after address validation has been performed.
  3. Email search timeout: You can specify a timeout for each email search. The searches will timeout after the specified period of time if no response is returned within that period. If the timeout occurs, the email result of 'Unknown' will be returned. To set the timeout, find EMAIL_RESULT_TIMEOUT and specify the time in seconds(s).

Additional optional parameters can be set at the top of the JavaScript file and their usages are explained in the comments found in the JavaScript.

Changes to email_proxy.aspx
  1. Set STRING TOKEN field to the security token that you are subscribed to.
  2. STRING MACHINEURI is already configured to point to the hosted location of QAS Email Validation REST Service. The value will have to be amended if the QAS hosted REST Service location is updated or changed. Currently, the URL is https://api.experianmarketingservices.com/query/.
List of main configuration files
  • qas_test.html
    A sample webpage which demonstrates the implementation codes of Email Validate.
  • qas.css
    A cascading style-sheet which provides styling to the mark-ups texts in qas_test.html.
  • qasConfig.js (formally qas.js)
    A JavaScript file which provides general options and call-back handlers for the supported services.
  • email_proxy.aspx
    A proxy class which provides functionality to communicate web requests to Email web service.
  • email.js
    A JavaScript file which contains the business logics and workflows for email validations.
Email sample code

Get started