An activity can have a number of ‘child tasks’ associated with it. For example, an activity of ‘Complete Report Submission’ could have the following child tasks associated:
Each child task can be allocated to a Person, a Team or a role; these allocations can be different to, or the same as, the allocation in the parent activity.
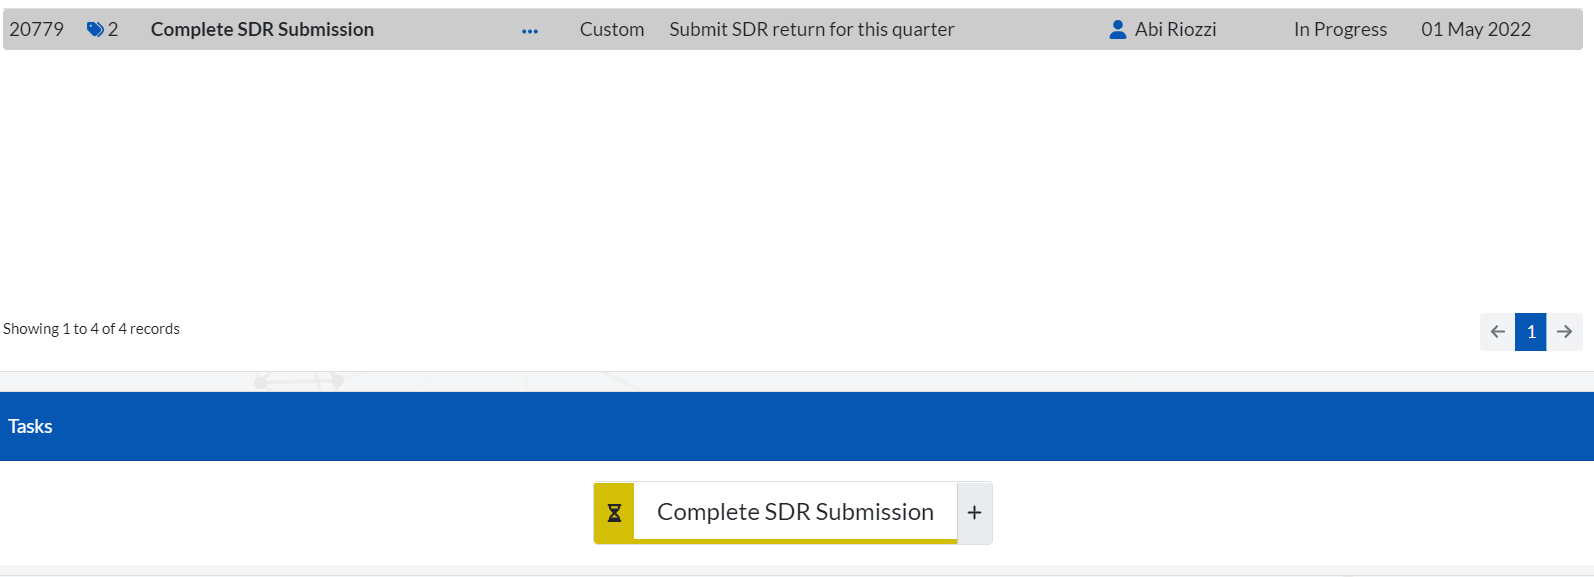
To create a child task, highlight the relevant parent activity by clicking once on the row, scroll to the bottom of the page to the ‘Tasks’ section, and click on the ‘+’ sign next to the name of the parent activity:
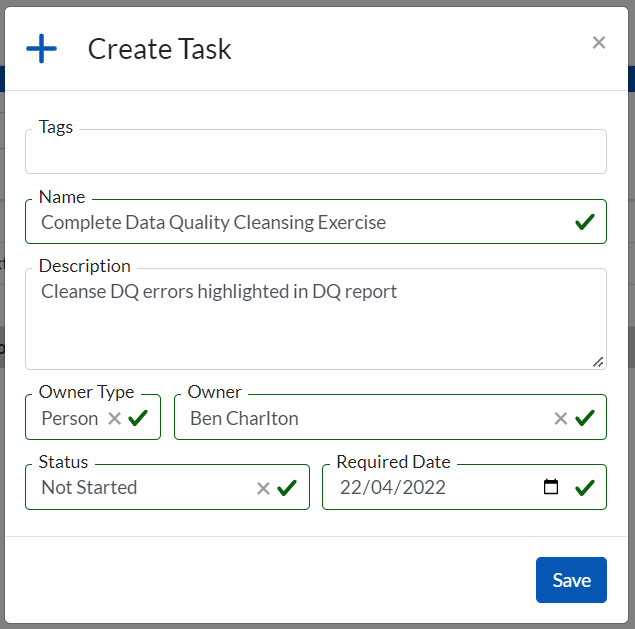
Populate the fields in the ‘Create Task’ window.
The person, team or role allocated to the task will receive an email with the details of the task, the due date, and a link to the Tasks page within the software.
As well as receiving an email when you, your team or your role have been assigned to an activity or a task, your tasks will be available to view and action in ‘My Tasks’. This can be found in Core > Workflow > My Tasks.
The ‘My Tasks’ section will present you with an overview dashboard, which will tell you succinctly how many tasks are allocated to you, your team or your role, and the status of each task:
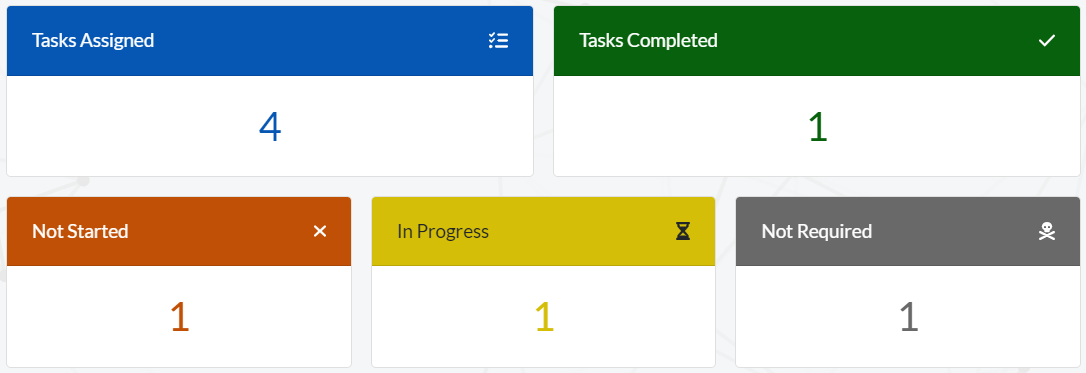
Hovering over each of these widgets will also tell you how many of each task status is overdue.
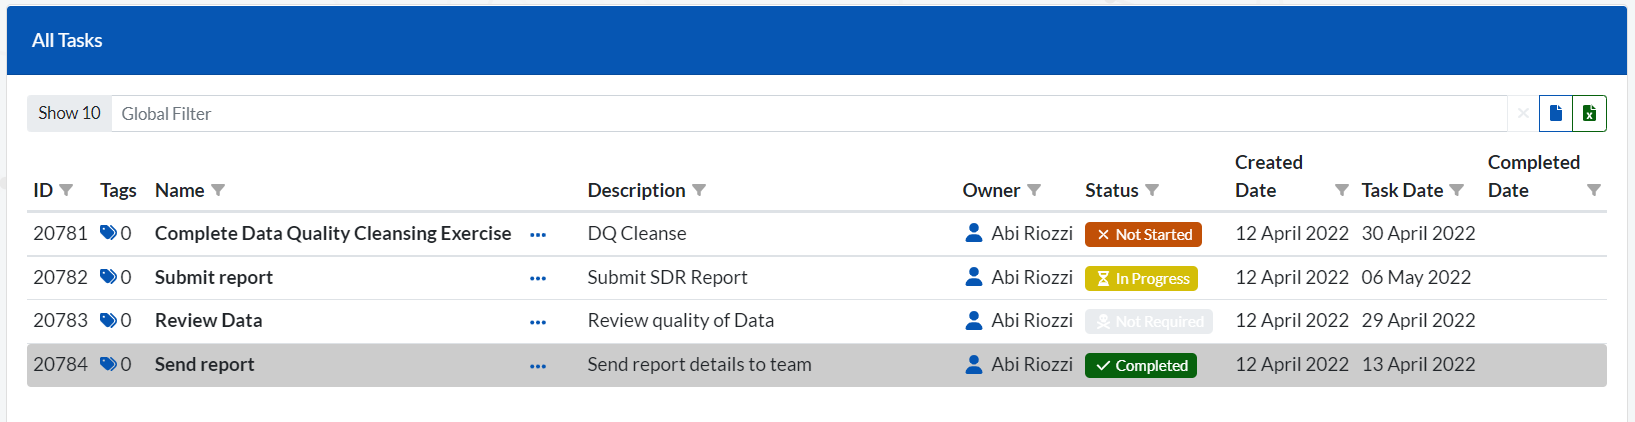
Scrolling further down the page will bring you to an itemised list of all tasks allocated to you, your team or your role, with the owner, status, the date the task was created, task date (the task’s due date) and the date the task was completed (if applicable):
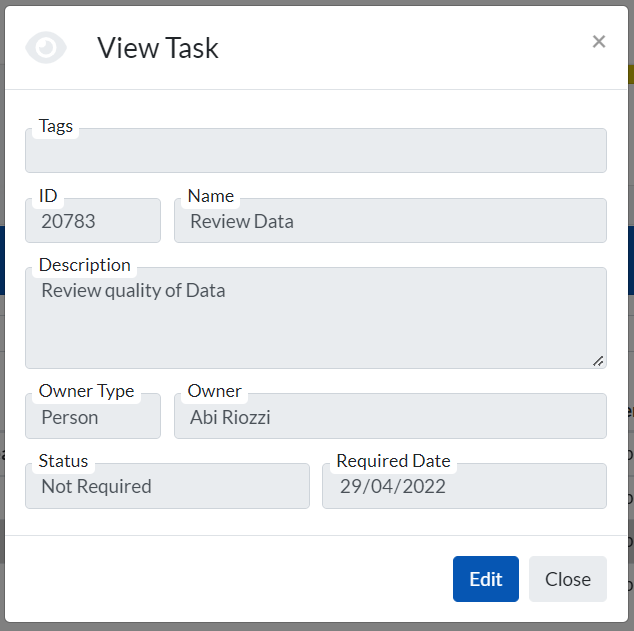
To view a task from this list, double click on the relevant row, or click on the ellipse and select ‘View Task’. This will open the task, from where you can ‘edit’ to update specific information, or to update the status of the task (e.g. from ‘In Progress’ to ‘Complete’ when the task has been completed):