Before heading over to Power Pages you must download the EDQ Page Manager library:
Go to the Experian Data Validation Configuration Power App.
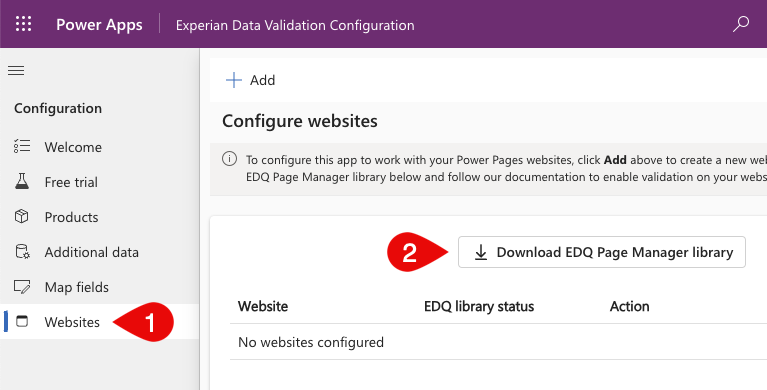
Select the Websites page from the left menu.
Click the Download EDQ Page Manager library button at the top of the page and save the file in a convenient location. It will download as the file edq_pagemanager with no file extension.
With the library downloaded you can now add it to your Power Pages website as a Web File:
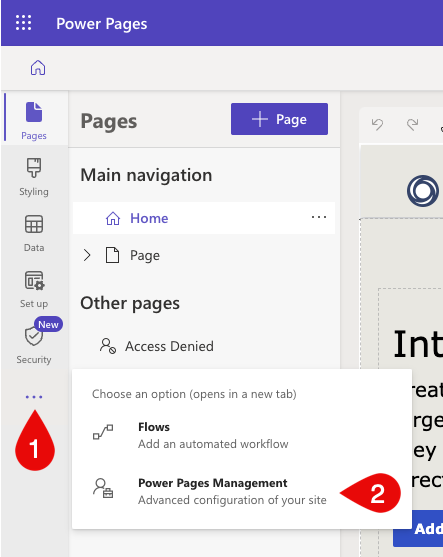
Select Websites from the left hand menu of the main Power Apps interface.
Click the pencil icon beside the website you want to configure and Power Page Design Studio will open in a new tab.
Select Power Pages Management from the left-hand navigation:
In the new tab that appears select Web Files from the left menu.
Click the + New button in the top menu.
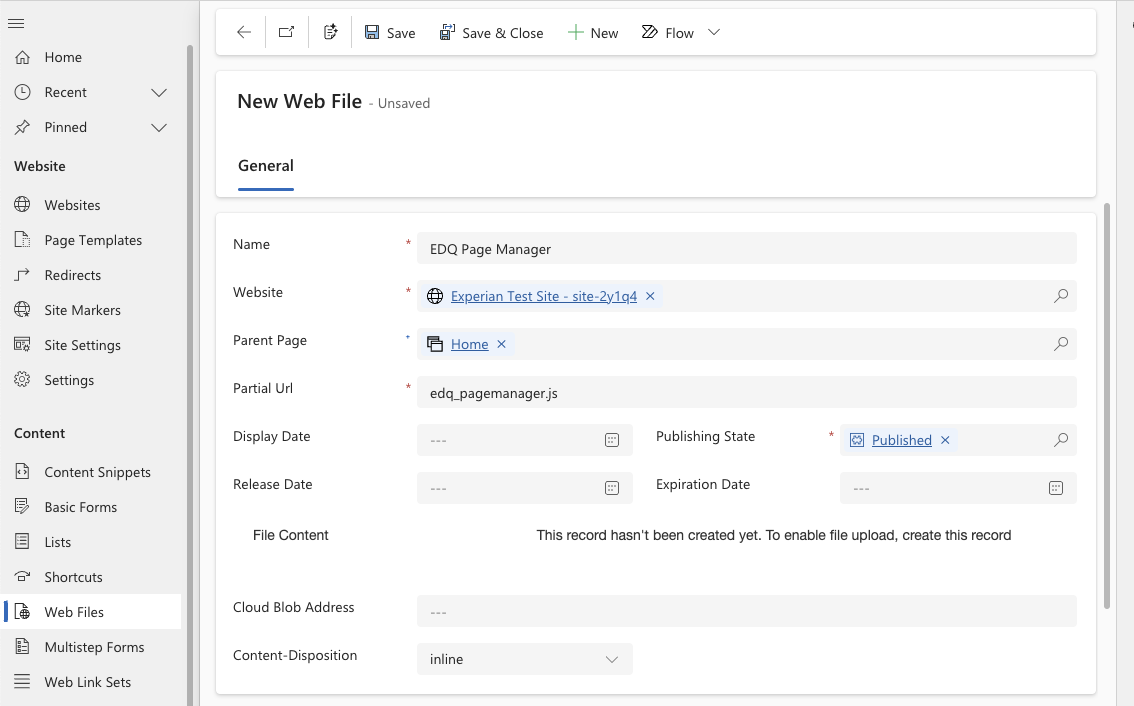
Complete the New Web File form as follows:
Name = EDQ Page Manager
Website = Choose relevant site
Parent Page = Home
Partial Url = edq_pagemanager.js (must be named exactly as specified)
Publishing State = Published
Click the Save button in the top menu and the File Content field will become available.
Click the Choose file button and select the EDQ Page Manager library that was previously downloaded.
Once the file has uploaded, click the Save & Close button in the top menu.
Form configuration
Return to the Power Pages Design Studio tab and select Data from the left-hand navigation. Navigate to the relevant Table and corresponding Form you wish to configure. Any address, email and phone fields should be configured with the appropriate EDQ control to enable validation:
Select the first address field you would like to be validated, typically Address 1: Street 1 by default. If you are configuring a composite address field, an additional custom text field must be added to the form to act as the search trigger and the EDQ control configured on this field instead.
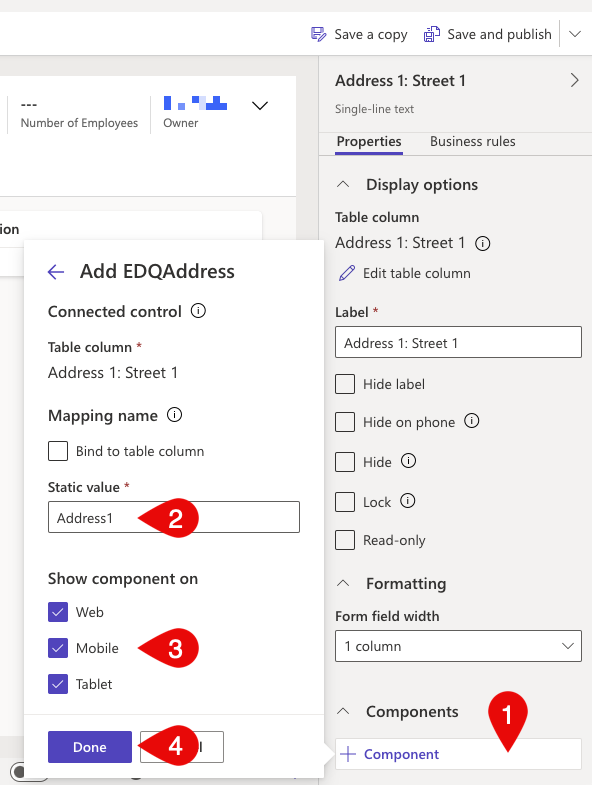
Expand the Property pane on the right and select the Properties tab, expand the Components section and click the + Component button.
Click the Get more components button at the bottom of the Add component panel.
Search for and select EDQAddress, then click Add.
Select the EDQAddress component that has now appeared in the list.
Enter the mapping name in the Static value text box. This would be Address1 or Address2 if you've followed the quick setup instructions and are using the mappings that come pre-configured with the solution.
Select where you want the control to be shown - Web, Mobile and/or Tablet.
Click Done to close the component configuration panel.
Repeat these steps for other address fields as required.
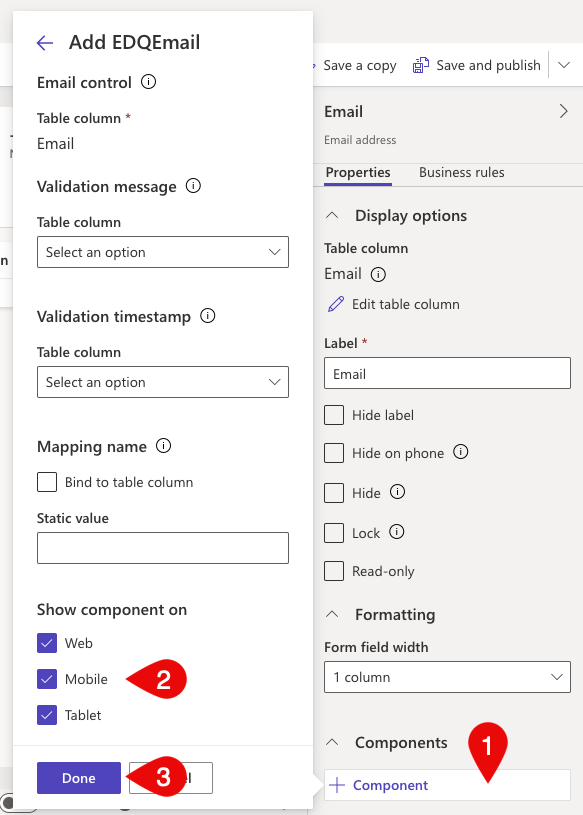
Select the email field you would like to be validated.
Expand the Property pane on the right and select the Properties tab, expand the Components section and click the + Component button.
Click the Get more components button at the bottom of the Add component panel.
Search for and select EDQEmail, then click Add.
Select the EDQEmail component that has now appeared in the list.
Configuration of the Validation message and Validation timestamp is not currently possible due to a limitation of Power Pages.
Configuration of Mapping name is optional, but is detailed on the email mapping page if required.
Select where you want the control to be shown - Web, Mobile and/or Tablet.
Click Done to close the component configuration panel.
Repeat these steps for other email fields as required.
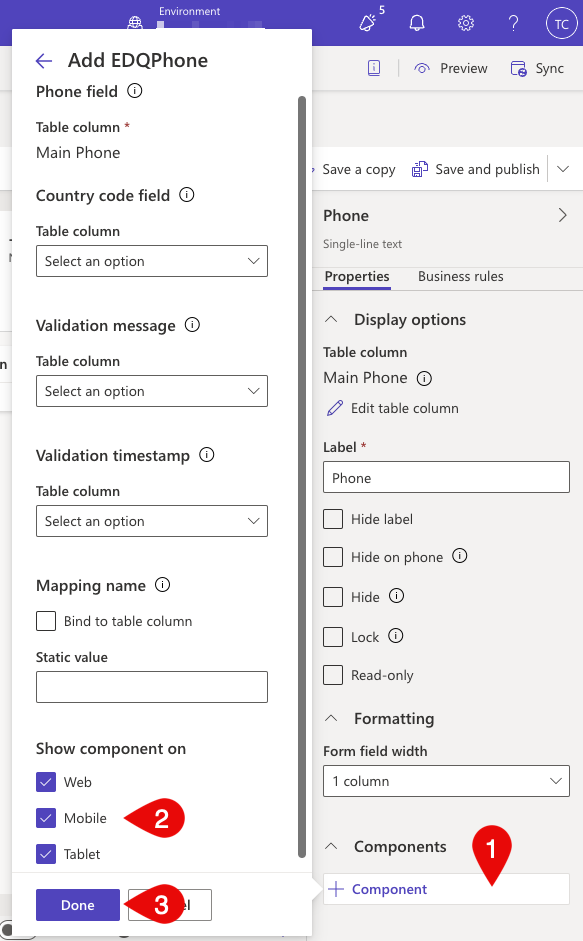
Select the phone field you would like to be validated.
Expand the Property pane on the right and select the Properties tab, expand the Components section and click the + Component button.
Click the Get more components button at the bottom of the Add component panel.
Search for and select EDQPhone, then click Add.
Select the EDQPhone component that has now appeared in the list.
Configuration of the Country code field, Validation message and Validation timestamp is not currently possible due to a limitation of Power Pages.
Configuration of Mapping name is optional, but is detailed on the phone mapping page if required.
Select where you want the control to be shown - Web, Mobile and/or Tablet.
Click Done to close the component configuration panel.
Repeat these steps for other email fields as required.
Save and publish the form
Click Save and publish in the command bar to commit your form changes.
Navigate back and then repeat the steps on this page for other forms as required.
Enable code components on form fields
If a Dataverse form field has been configured to use a code component using the Data workspace or a model-driven app, you must enable the code component to be used when a form is used on a webpage.
Return to the Power Pages Design Studio tab and select Pages from the left-hand navigation.
Navigate to the page containing your form and then find the form on the page.
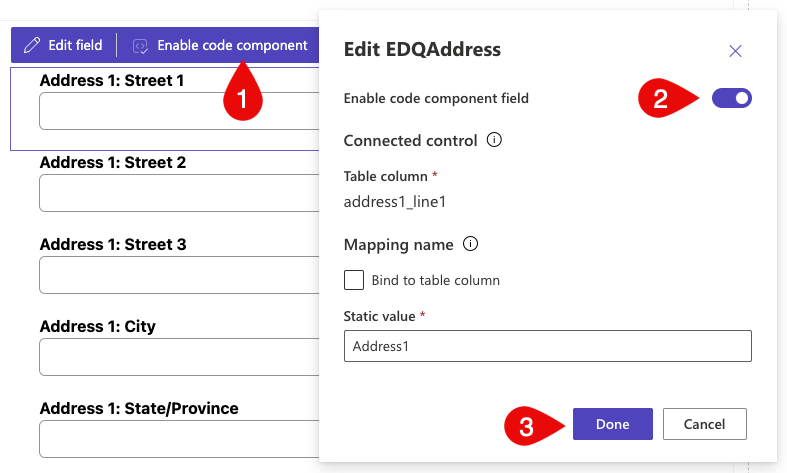
Select one of the address/email/phone fields you configured above.
Click the Enable code component button that appears, toggle the Enable code component field and click the Done button.
Repeat the previous step for all address/email/phone fields to which you added an EDQ component.
Sometimes the form field won't appear in the form editor and you won't be able to enable the code component this way. If this happens you can configure things another way via Power Pages Management.
Select Power Pages Management from the left-hand navigation:
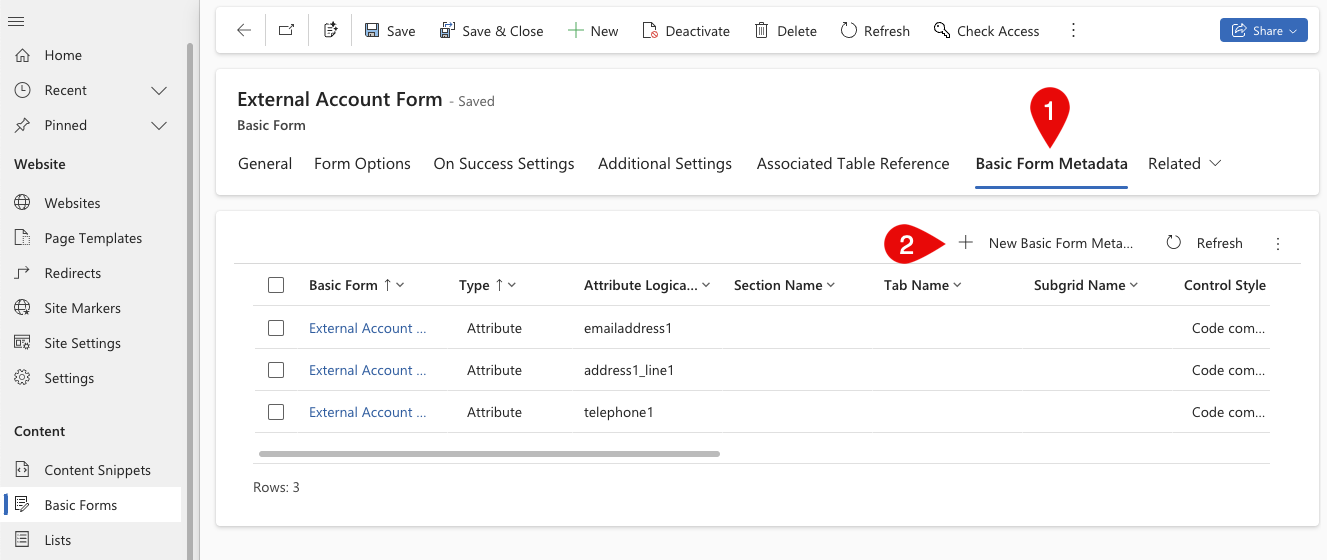
In the new tab that appears select Basic Forms from the left menu.
Click the name of the form containing the missing field.
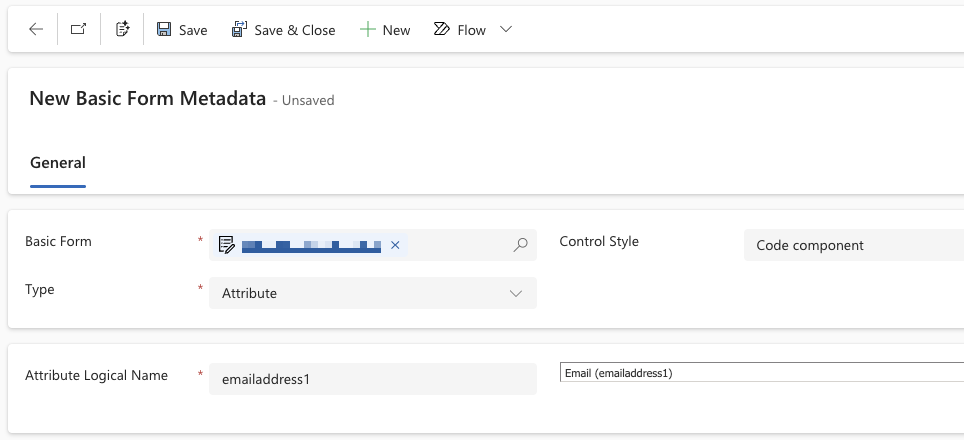
Select the Basic Form Metadata tab and then click the + New Basic Form Metadata button.
Complete the New Basic Form Metadata form as follows:
Type = Attribute
Control Style = Code component
Attribute Logical Name = Select the field in question from the drop down
Click the Save & Close button in the top menu and repeat the process for other fields as required.