Other integrations
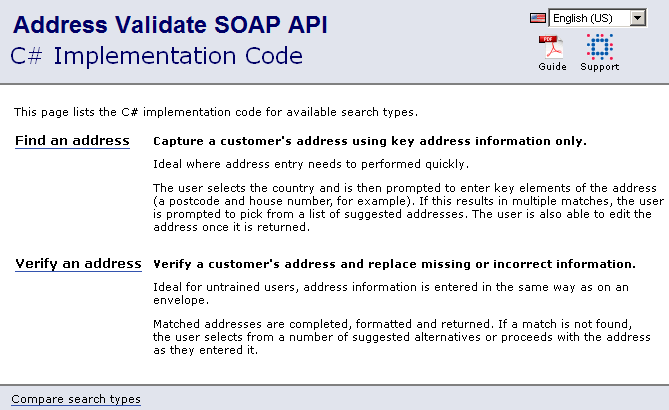
Address Validate SOAP sample code provides best practice integration of our global address search and verification functionality. The sample code guide will help you get set up and test out the API.
For integrators who want to access our service directly, refer to SOAP endpoints and SOAP requests.
There are several samples codes you can use:
You can quickly test out the requests and responses and see how the API behaves with our pre-configured Postman collections. Simply import the relevant collections, add your token as a variable and start making requests with your desired parameters.
Get your Address Validate SOAP Postman collection
Other samples codes you can use include:
This sample code provides best practice integration of our global address search and verification functionality. For integrators who want to access our service directly, refer to the SOAP API integration guide.
This quick deployment will result in a functional setup which can be used as a basis for a customized address searching and validation.
1. Extract the sample code
Before you begin, ensure that:
To extract the package and make the code accessible to IIS:
2. Enter your connection details
Before you begin, ensure that:
To get the code to communicate with your account, you have to enter your username/password or token with the endpoint of its web service. If you would like to connect to the code pages via a proxy server, you should also enter optional proxy information.
Navigate to the location you extracted the code package to. In most cases, this will be C:\Inetpub\wwwroot\ICV2_CSharp (where C is the local disk of the machine you want to host the sample code pages on).
Open web.config in a plain text editor and configure the following parameters in the <appSettings> section:
Edit <add key="Experian.Qas.Capture.OnDemandUrl" value="ENDPOINT"/>
Where ENDPOINT is the endpoint of your regional service.
Ensure that only one authentication method is used: if you are using username and password, leave the token empty and vice versa.
For username and password authentication:
<add key="Experian.Qas.Capture.OnDemandUsername" value="ONDEMAND_USERNAME"/>
<add key="Experian.Qas.Capture.OnDemandPassword" value="ONDEMAND_PASSWORD"/>
Where ONDEMAND_USERNAME is your username and ONDEMAND_PASSWORD is the password.
Note that special characters are not supported, and must be replaced with the relevant Unicode reference. For example, if your password is contraseña, you should use contraseña instead.
For token authentication:
<add key="Experian.Qas.Capture.OnDemandAuthToken" value="ONDEMAND_AUTH-TOKEN"/>
Where ONDEMAND_AUTH-TOKEN is your token.
3. (Optional) Connect via a proxy server
Navigate to the location you extracted the code package to. In most cases, this will be C:\Inetpub\wwwroot\ICV2_CSharp (where C is the local disk of the machine you want to host the sample code pages on).
Open web.config in a plain text editor and uncomment the following lines in <appSettings> section and configure them accordingly:
<add key="Experian.Qas.Capture.ProxyUrl" value="PROXY_ADDRESS:PORT"/>
Where PROXY_ADDRESS is the location of your proxy server and PORT is the port number associated with this proxy.
<add key="Experian.Qas.Capture.ProxyUser" value="PROXY_USER"/>
<add key="Experian.Qas.Capture.ProxyPassword" value="PROXY_PASSWORD"/>
Where PROXY_USER is the user login for this proxy and PROXY_PASSWORD is the corresponding password.
4. Configure IIS
Before you begin, ensure that:
Configuring IIS to publish the code will make the address searching and validating pages accessible to you and other users:
5. Test your deployment
Check that your deployment has been successful: http://localhost/ICV2_CSharp. You will be directed to the index page if the deployment has been successful:
These web pages can be used as a basis for your own deployment. Alternatively, you can integrate address searching and validation into your own pages.
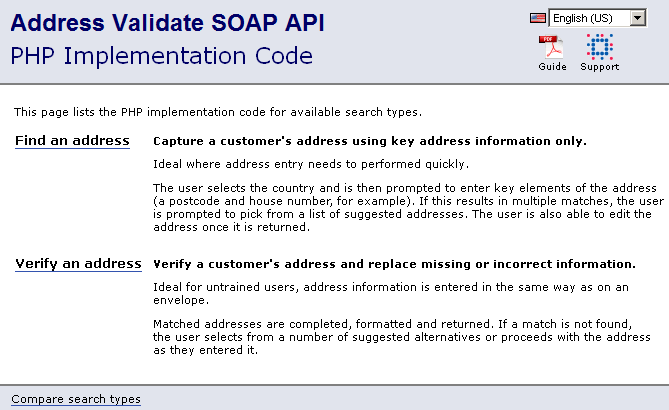
This sample code provides best practice integration of our global address search and verification functionality. For integrators who want to access our service directly, refer to the SOAP API integration guide.
This quick deployment will result in a functional setup which can be used as a basis for a customized address searching and validation.
1. Extract the sample code
Before you begin, ensure that:
To extract the package and make the code accessible to Apache Tomcat:
2. Download Address Validate WSDL
Address Validate WSDL
Open the Pro On Demand WSDL in a web browser, depending on the endpoint of your regional service.
Save the page as ProOnDemandService.wsdl on the local disk of the machine you are hosting sample code pages on. For example: C:\Inetpub\WSDLs\ProOnDemandService.wsdl
Open the Oasis security documents: https://docs.oasis-open.org/wss/2004/01/oasis-200401-wss-wssecurity-secext-1.0.xsd
Save the page as OasisSecurity.xsd to the same location as the Address Validate WSDL.
Open your local copy of ProOnDemandService.wsdl in a plain text editor.
Locate the <xs:import> line at the top of the <xs:schema> section and configure the schemaLocation parameter as below:
<xs:import namespace="https://docs.oasis-open.org/wss/2004/01/oasis-200401-wss-wssecurity-secext-1.0.xsd" schemaLocation="Local_Path" />
Where Local_Path is the location you saved the Oasis security document to (steps 2 and 4). For example, C:\Inetpub\WSDLs\OasisSecurity.xsd
Save ProOnDemandService.wsdl.
3. Add connection details to web.xml
Before you begin, ensure that:
To get the code to communicate with your account, you have to enter your username/password or token along with the endpoint of its web service.
Navigate to the location where you saved the package.
The default location is: C:\Inetpub\wwwroot\ICV2_PHP (where C is the local disk of the machine you want to host the sample code pages on).
Open constants.inc in a plain text editor and configure the following parameters in the Configuration settings section:
define("CONTROL_WSDL_URN", "WSDL_location");
Where WSDL_location is the is the location you saved the the WSDL to earlier. For example: C:\Inetpub\WSDLs\ProOnDemandService.wsdl
Ensure that only one authentication method is used: if you are using username and password, leave the token empty and vice versa.
For username and password authentication:
define("USERNAME", "your_username");
define("PASSWORD", "your_password");
Where your_username is your username, and your_password is the password.
Note that special characters are not supported, and must be replaced with the relevant Unicode reference. For example, if your password is contraseña, you should use contraseña instead.
For token authentication:
define("AUTH_TOKEN", "your_token");
Where your_token is your token.
4. (Optional) Connect via a proxy server
Navigate to the location where you saved the package.
The default location is: C:\Inetpub\wwwroot\ICV2_PHP (where C is the local disk of the machine you want to host the sample code pages on).
Open constants.inc in a plain text editor and uncomment the following lines in the Configuration settings section and configure them accordingly:
Enter your proxy server
define("CONTROL_PROXY_NAME", "PROXY_SERVER");
define("CONTROL_PROXY_PORT", 8080);
Where PROXY_SERVER is the location of your proxy server and 8080 is the port number associated with this proxy.
Enter your proxy credentials
define("CONTROL_PROXY_LOGIN", "PROXY_USER");
define("CONTROL_PROXY_PASSWORD", "PROXY_PASSWORD");
Where PROXY_USER is the user login for this proxy and PROXY_PASSWORD is the corresponding password.
5. Test your deployment
Check that your deployment has been successful: http://localhost/ICV2_PHP. You will be directed to the index page if the deployment has been successful:
These web pages can be used as a basis for your own deployment. Alternatively, you can integrate address searching and validation into your own pages.
Copy the code in this section to the relevant areas of your HTML pages.
References to the Javascript and CSS files have to be added to all the pages you want address searching to be applied to. The following should be added to the <head> section:
<link rel="stylesheet" href="css/qas-ic.css" type="text/css" />
<script type="text/javascript" src="js/jquery/jquery-1.6.2.min.js">
</script>
<script src="js/jquery/jquery.tmpl.min.js"></script>
<script type="text/javascript" src="js/jquery/jquery.cookie.js"></script>
<script type="text/javascript" src="js/jquery/jquery.showLoading.min.js">
</script>
<script type="text/javascript" src="js/qas-ic.js"></script>
<script type ="text/javascript" src="js/qas-ic.addresscapture.js">
</script>
Input and output fields are the basis of address searching and validation. Address information is provided by the user via input fields, passed to Address Validation and then displayed via the output fields for confirmation.
Insert the following Javascript at the bottom of the <head> section:
<script type="text/javascript">
$(function(){
qas.addresscapture.Initialize("div#QAS_Container");
});
</script>
This will populate the address searching section while the page loads.
Insert the following <div> element within the <body> section:
<div id="QAS_Container"></div>
This element will be dynamically populated with the input fields required to collect information from the user.
You should place this element in the area of the page you would like the input fields to appear. For example, if you were adding address searching to the ordering page of an online shop, you might place this <div> between the first/last name and credit card number/expiry date fields.
Save the changes and load the web page in a browser to test the integration.
References to the Javascript and CSS files have to be added to all the pages you want to address validation to be applied to. The following should be added to the <head> section:
<link rel="stylesheet" href="css/qas-ic.css" type="text/css" />
<script type="text/javascript" src="js/jquery/jquery-1.6.2.min.js">
</script>
<script type="text/javascript" src="js/jquery/jquery-ui-1.8.14.custom.min.js"></script>
<script type="text/javascript" src="js/jquery/jquery.cookie.js">
</script>
<script type="text/javascript" src="js/qas-ic.js"></script>
<script type="text/javascript" src="js/qas-ic.verification.js"></script>
Input and output fields are the basis of address searching and validation. Address information is provided by the user via input fields, passed to Address Validation and then displayed via the output fields for confirmation.
Insert the following <fieldset> element within the <body> section:
<fieldset>
<legend><span class="translation">
LANGUAGES.VERIFICATION.MailingAddress</span></legend>
<ol><li>
<label>
<span class="translation">LANGUAGES.VERIFICATION.InputAddress1</span>
</label><input id='add1' type='text' size="30" /></li><li><label>
<span class="translation">LANGUAGES.VERIFICATION.InputAddress2</span>
</label><input id='add2' type='text' size="30" /></li><li><label>
<span class="translation">LANGUAGES.VERIFICATION.InputAddress3</span>
</label><input id='add3' type='text' size="30" /></li><li><label>
<span class="translation">LANGUAGES.VERIFICATION.InputCity</span>
</label><input id='city' type='text' size="30" /></li><li><label>
<span class="translation">LANGUAGES.VERIFICATION.InputState</span>
</label><input id='state' type='text' size="30" /></li><li><label>
<span class="translation">LANGUAGES.VERIFICATION.InputZip</span>
</label><input id='zip' type='text' size="10" /></li><li><label>
<span class="translation">LANGUAGES.VERIFICATION.InputCountry</span>
</label><select id='country' class="countrySelector"></select>
</li></ol>
</fieldset>
You should place this element in the area of the page you would like it to appear. For example, if you are adding address validation to the contact details page of a customer management system, you might place this <fieldset> between the first/last name and the telephone number/email address fields.
You can add more <fieldset> elements if required. By default, your address validation pages can contain up to 3 of these elements (although you can add more later).
To enable the sample code to distinguish between them, you should make the following changes to any subsequent fieldsets that you add:
fieldset or AlternateAddress in a thirdfieldset or alt in a thirdSee verification.htm (supplied with the sample code) for an example of an sample which makes use of multiple fieldsets.
Insert the following <input> elements below the <fieldset> element(s):
<input id='subButton' name='subButton' class='translation'
type='button' value='LANGUAGES.VERIFICATION.ButtonSubmit'
onclick='qas.verification.QAS_Verify()' />

<input id='clear' name='subButton' class='translation' type='submit'
value='LANGUAGES.VERIFICATION.ButtonClear' onclick='clearforms()' />
This will place buttons below the address entry form(s), allowing the user to submit their address information to Address Validate or clear all entries.
Insert the following Javascript at the bottom of the <body> section:
<script type="text/javascript">
$(document).ready()
{qas.verification.Init();
};
</script>
This will allow address validation to take place, once the page has loaded.
Save the changes and load the web page in a browser to test the integration.
Once integrated, you can configure the pages to fully incorporate them into your existing website structure. You can add and remove below elements as necessary.
Modify the following three areas to customize your setup:
1. Set a default country and address layout
Address Validate code sets all country selection dropdowns to a default value on user's first visit. On subsequent visits, these dropdowns default to each user's last selected country (see cookie settings below for details).
To modify the default settings, open qas-ic.js from the js folder.
To configure which country will be selected by default on user's first visit, locate the following line and configure it accordingly:
qas.search.DEFAULT\_COUNTRY\_ID = "XYZ";
Where XYZ is the country code. For example, using the USA code will enable Address Validate to search for addresses within United States by default.
Note that you have to be licensed for each dataset you want to use. To remove entries from the country dropdowns see country selection options below.
You can also configure the default address layout that Address Validate will use when returning addresses. To do this, locate the following line and configure it accordingly:
qas.search.DEFAULT_LAYOUT = "LayoutName";
Where LayoutName is the name of the layout you want to use by default. In most cases, this should be set to Database Layout which exists for every country.
You can also set specific layouts for Address Validate to use when returning addresses for individual countries. See country specific layout settings below for details.
To test these changes, reload your deployment by clearing your browser's cache (Ctrl+F5).
2. Set appropriate language options
If you have users from multiple countries, you should set up the appropriate language files.
You can have one language file for each language. These files are used to ensure that the prompts and messages are displayed in the appropriate language.
Creating a new language file
The sample code is provided with two language files: UK English and US English. To create a file for another language:
Navigate to the location you extracted the code package to. In most cases, this will be: C:\Program Files\Apache Software Foundation\Tomcat X\webapps (where X is the version of Apache Tomcat you want to use).
Navigate to \js\lang.
Make a copy of one of the Javascript files in the lang folder and name it appropriately. For example, a French language file might be called fr.js.
Open qas-ic.js.
In the qas.lang.Type and qas.lang.DisplayMapping sections add entries to include the new language file:
qas.lang.Type = {
EN_UK : "en-gb",
EN_US : "en-us",
FR : "fr" };
qas.lang.DisplayMapping = {
EN_UK : "English (UK)",
EN_US : "English (US)",
FR : "Français" };
Where FR is an internal reference for the language file, fr is its filename (the file extension is not required), and Français is how you would like this option to appear in the code pages.
Note that the penultimate entry in each list has to end with a comma (,).
To test these changes, reload your deployment by clearing your browser's cache (Ctrl+F5).
Editing a language file
To edit the prompts and messages in a language file:
Open the language file you want to edit. For example, to translate messages for French users, open the fr.js file.
Scroll down to the section you want to make changes to. The language files are made up of five sections:
INDEX and MATRIX sections control the text found on the index and comparison pages. In most cases, you will not need to edit these.COMMON section controls text shared by all pages.ADDRESS_CAPTURE and VERIFICATION sections control text found on the address searching and validation pages, respectively.Locate the message you would like to change and edit its value (each message has a name and a value, the name shouldn't be changed).
For example, to translate the first message in the address searching process for French users, you should locate this line in the ADDRESS_CAPTURE section:
"PleaseSelectACountryOrDatamap" : "To begin, select your country.",
And change it to: "PleaseSelectACountryOrDatamap" : "Pour commencer, sélectionnez votre pays.",
Repeat step 3 for other messages as necessary.
You can also link directly to a regional Experian Data Quality support site by editing the last two letters of the SupportLink line in the COMMON section.
For example, editing the line below will map the support link on the sample Code pages to the French support site: "SupportLink": "http://support.qas.com/?sc=fr",
Available options are:
To test these changes, reload your deployment by clearing your browser's cache (Ctrl+F5).
Creating a new flag
Each language file supplied with the sample code is accompanied by an image of the relevant flag.
To create an image for your new language file:
Navigate to img\flags.
Make a copy of one of the .png files in the flags folder and rename it accordingly. For example, fr.png to accompany the French language file.
Open the file with any photo editor and modify.
To test these changes, reload your deployment by clearing your browser's cache (Ctrl+F5).
3. Prepare your web pages for live deployment
This section offers steps that should be taken before publishing your deployment to a live website.
Debug mode
While testing your deployment, you may receive non-critical error messages which you do not want to display to the end users.
For example, searching with too few details (e.g. house number only) will result in an error message but interaction will still be possible. To prevent this type of error message from displaying to your end users, locate the following line in the qas-ic.js file and set to false:
qas.search.DISPLAY_ERROR = false;
Debug may alert you to timeout issues affecting your deployment.
Position on page and styling
You can position the address searching and validation fields anywhere within a web page, either by placing them within the markup of an existing page or by editing the pages provided with the code. If you decide to edit the provided pages, you should remove any elements that you do not need before adding new content.
Note that nothing should be removed from the <head> sections.
Once your web pages contain the required content, you can style them by editing the qas.ic.css stylesheet, located in the css folder. See CSS property reference for details.
Address layouts define how addresses are formatted by Address Validate. You can set the default address layout using the DEFAULT_LAYOUT setting.
If you want to override the default setting when searching in one or more specific countries, locate the following lines within the qas-ic.js file and configure them accordingly:
qas.search.DEFAULT_COUNTRY_LAYOUT_MAP = {
 "XY1" : "LayoutName1",
 "XY2" : "LayoutName2"
};
Where XY1 and XY2 are the three-character identifiers of the datasets you are licensed to use; and LayoutName1 and LayoutName2 are the names of the corresponding layouts you want to be used with these countries.
You can add as many lines to this setting as you need; one for each dataset that you are licensed to use. Any datasets that do not appear in this list will use the default layout. To test these changes, reload your deployment by clearing your browser's cache (Ctrl+F5).
Some address layouts contain more information than the standard address details. For example, names information. To find out what extra information is available, refer to your data guide(s) or contact us.
To add additional address lines (this example uses GeoCodeLayout):
Open qas-ic.verification.js and locate the following section:
qas.verification.address_field_ids =
[["add1","add2","add3","city","state","zip"],
["billadd1","billadd2","billadd3","billcity","billstate","billzip"],
["altadd1","altadd2","altadd3","altcity","altstate","altzip"]];
Configure this section to include entries for the additional information you want to be returned. For example, to accommodate returned country, latitude and longitude information within the first fieldset element, add the following entries:
qas.verification.address_field_ids =
[["add1","add2","add3","city","state","zip","ctry","lat","long"],
["billadd1","billadd2","billadd3","billcity","billstate","billzip"],
["altadd1","altadd2","altadd3","altcity","altstate","altzip"]];
All entries within this section have to be unique and should represent the address elements in the order that they appear in the layout.
Open verification.htm and locate the first <fieldset> section. Insert the following lines immediately before the closing </ol> tag:
<li style="display:none">
<input id="ctry" type="text" size="10" /></li>

<li><label>
<span class="translation">LANGUAGES.VERIFICATION.Location</span>
</label>
<input class="readonly" id="lat" size="8" readonly="true" />
<input class="readonly" id="long" size="8" readonly="true" /></li>
Note that the ctry input element is not given a label and its <li> element has not been set to display on the page. This is to reduce duplication, as the country selection dropdown already contains this information.
However, this input element has to exist in the HTML since address elements are always returned in the order they appear in the layout.
Open one of your language files and add an entry in the VERIFICATION section for the Location label:
"Location": "Location:",
You should repeat this step for each of your language files, translating value as necessary.
Save qas-ic.verification.js, verification.htm and your language files.
To test these changes, reload your address validation page by clearing your browser's cache (Ctrl+F5).
The country selection dropdowns automatically include entries for every dataset you are licensed to use.
Sample code also includes an additional list of all countries in the country selection dropdowns (by default, this list appears under --Other--). If a user selects a country from this list, they will be asked to enter their address manually.
You may want to remove certain countries from this additional list. For example, for an online store you might remove countries which your company does not ship products to.
To remove countries:
qas-ic.js file in a text editor.qas.search.ALL_COUNTRIES section and highlight the entry you want to remove. For example, to remove Tuvalu:Address Validate sample code uses cookies to store users' search preferences locally.
To customize the default settings, locate the following lines in the qas-ic.js file and configure them accordingly:
qas.lang.COOKIE_NAME = "Language_Cookie";
...
qas.search.DEFAULT_COUNTRY_COOKIE_NAME = "Country_Cookie";
qas.search.DEFAULT_COUNTRY_COOKIE_EXPIRY = X;
Where:
Language_Cookie is the name of the cookie which stores the user's preferred languageCountry_Cookie is the name of the cookie which stores the user's preferred countryX is the number of days for which Cookie_Name will be stored on the user's machine (Language_Cookie will expire at the end of the user's browser session).To test these changes, reload your deployment by clearing your browser's cache (Ctrl+F5).
You can configure how the requests are made by modifying the following settings and their values, found in the qas-ic.js file:
qas.search.DEFAULT_PROMPTSET_TYPE = qas.search.PromptsetType.DEFAULT;
qas.search.DEFAULT_IS_FLATTEN = false;
qas.search.DEFAULT_THRESHOLD = 25;
qas.search.DEFAULT_TIMEOUT = 5000;
qas.search.DEFAULT_INTENSITY = qas.search.IntensityType.CLOSE;
qas.search.DEFAULT_LOCALISATION = "";
qas.search.DEFAULT_REQUEST_TAG = "";
qas.search.DEFAULT_IS_FORMATTED_ADDRESS_IN_PICKLIST = false;
To use the PHP sample code, FastCGI has to be installed on your system and the SOAP and OpenSSL PHP extensions have to be enabled.
Navigate to your PHP installation. For example C:\Program Files\PHP.
Open PHP.ini in a plain text editor.
Locate the following lines and ensure that they are not preceded by a semicolon (;):
extension=php_soap.dll
...
extension=php_openssl.dll
Address layouts define how addresses are formatted by Address Validate. You can set the default address layout using the DEFAULT_LAYOUT setting.
If you want to override the default setting when searching in one or more specific countries, locate the following lines within the qas-ic.js file and configure them accordingly:
qas.search.DEFAULT_COUNTRY_LAYOUT_MAP = {
 "XY1" : "LayoutName1",
 "XY2" : "LayoutName2"
};
Where XY1 and XY2 are the three-character identifiers of the datasets you are licensed to use; and LayoutName1 and LayoutName2 are the names of the corresponding layouts you want to be used with these countries.
You can add as many lines to this setting as you need; one for each dataset that you are licensed to use. Any datasets that do not appear in this list will use the default layout. To test these changes, reload your deployment by clearing your browser's cache (Ctrl+F5).
Some address layouts contain more information than the standard address details. For example, names information. To find out what extra information is available, refer to your data guide(s) or contact us.
To add additional address lines (this example uses GeoCodeLayout):
Open qas-ic.verification.js and locate the following section:
qas.verification.address_field_ids =
[["add1","add2","add3","city","state","zip"],
["billadd1","billadd2","billadd3","billcity","billstate","billzip"],
["altadd1","altadd2","altadd3","altcity","altstate","altzip"]];
Configure this section to include entries for the additional information you want to be returned. For example, to accommodate returned country, latitude and longitude information within the first fieldset element, add the following entries:
qas.verification.address_field_ids =
[["add1","add2","add3","city","state","zip","ctry","lat","long"],
["billadd1","billadd2","billadd3","billcity","billstate","billzip"],
["altadd1","altadd2","altadd3","altcity","altstate","altzip"]];
All entries within this section have to be unique and should represent the address elements in the order that they appear in the layout.
Open verification.htm and locate the first <fieldset> section. Insert the following lines immediately before the closing </ol> tag:
<li style="display:none">
<input id="ctry" type="text" size="10" /></li>

<li><label>
<span class="translation">LANGUAGES.VERIFICATION.Location</span>
</label>
<input class="readonly" id="lat" size="8" readonly="true" />
<input class="readonly" id="long" size="8" readonly="true" /></li>
Note that the ctry input element is not given a label and its <li> element has not been set to display on the page. This is to reduce duplication, as the country selection dropdown already contains this information.
However, this input element has to exist in the HTML since address elements are always returned in the order they appear in the layout.
Open one of your language files and add an entry in the VERIFICATION section for the Location label:
"Location": "Location:",
You should repeat this step for each of your language files, translating value as necessary.
Save qas-ic.verification.js, verification.htm and your language files.
To test these changes, reload your address validation page by clearing your browser's cache (Ctrl+F5).
The country selection dropdowns automatically include entries for every dataset you are licensed to use.
Sample code also includes an additional list of all countries in the country selection dropdowns (by default, this list appears under --Other--). If a user selects a country from this list, they will be asked to enter their address manually.
You may want to remove certain countries from this additional list. For example, for an online store you might remove countries which your company does not ship products to.
To remove countries:
qas-ic.js file in a text editor.qas.search.ALL_COUNTRIES section and highlight the entry you want to remove. For example, to remove Tuvalu:Address Validate sample code uses cookies to store users' search preferences locally.
To customize the default settings, locate the following lines in the qas-ic.js file and configure them accordingly:
qas.lang.COOKIE_NAME = "Language_Cookie";
...
qas.search.DEFAULT_COUNTRY_COOKIE_NAME = "Country_Cookie";
qas.search.DEFAULT_COUNTRY_COOKIE_EXPIRY = X;
Where:
Language_Cookie is the name of the cookie which stores the user's preferred languageCountry_Cookie is the name of the cookie which stores the user's preferred countryX is the number of days for which Cookie_Name will be stored on the user's machine (Language_Cookie will expire at the end of the user's browser session).To test these changes, reload your deployment by clearing your browser's cache (Ctrl+F5).
You can configure how the requests are made by modifying the following settings and their values, found in the qas-ic.js file:
qas.search.DEFAULT_PROMPTSET_TYPE = qas.search.PromptsetType.DEFAULT;
qas.search.DEFAULT_IS_FLATTEN = false;
qas.search.DEFAULT_THRESHOLD = 25;
qas.search.DEFAULT_TIMEOUT = 5000;
qas.search.DEFAULT_INTENSITY = qas.search.IntensityType.CLOSE;
qas.search.DEFAULT_LOCALISATION = "";
qas.search.DEFAULT_REQUEST_TAG = "";
qas.search.DEFAULT_IS_FORMATTED_ADDRESS_IN_PICKLIST = false;
Below is a non-exhaustive list of CSS properties used by Address Validate SOAP sample code. You can edit these properties in the qac-ic.css stylesheet to adapt the pages to suit your requirements.
In most cases you will not need to modify properties found in the template section, with two exceptions:
| Properties | Description |
|---|---|
| .qas-container | Controls the size of the container which holds the sample code elements. |
| .qas-content | Controls the appearance of the content area. |
If your sample code appears on a page which references your own stylesheet, you may want to remove this section from qac-ic.css to avoid conflicts.
| Code | Description |
|---|---|
| body | Allows you to set the fonts that control the general appearance of the page. |
| h1, h2, h3 | Controls the size, appearance, and spacing of the various headings. |
| a, a:hover | Controls the appearance of dormant and active hyperlinks. |
In most cases you will not need to modify properties found in the tables section, with two exceptions:
| Properties | Description |
|---|---|
| table | Controls the appearance of tables, allowing you to modify the spacing of containers. |
| tr, td | These classes do not exist by default in the sample code, but you can add them to control the appearance of all table rows or cells. |
In most cases you will not need to modify properties found in the integration pages section, with one exception:
| Element | Descrption |
|---|---|
| input.readonly | Controls the appearance of read-only input elements, such as the returned country. |
The fieldset section controls the appearance of elements in the address validation page only.
| Element | Description |
|---|---|
| fieldset | Controls the size and appearance of the fieldsets found on the address validation page. |
| label | Controls the alignment and appearance of the field labels within fieldsets (e.g. "City", "ZIP Code"). |
| .first | Controls the alignment and position of the first fieldset to appear on a page. |
| legend | Controls the appearance of the legend for each fieldset (e.g. "Mailing Address", "Billing Address"). |
| fieldset ol | Controls the format and alignment of fields within each fieldset, allowing you to adjust spacing to suit your pages. |
| fieldset li | Controls the alignment and appearance of individual list items within a fieldset (usually address fields). |
| .countrySelector | Controls the size and appearance of the country selection dropdown in the address validation pages. |
| fieldset input | This class does not exist by default in the sample code, but you can add it to control the appearance of all input elements in the address validation page. |
The showloading section controls the appearance of the loading indicator in the address searching page.
| Indicator | Description |
|---|---|
| .loadingindicator | Controls the size, positioning and graphic used by the loading indicator on the address searching page. |
| .loadingindicatoroverlay | Controls the appearance and position of the overlay which grays out the input areas when the address searching page is loading. |
The JQuery CSS section controls the appearance of the address validation pop up dialog.
| Properties | Description |
|---|---|
| .ui-helperclearfix | Controls the alignment of title boxes, and can be used to control their size. |
| .ui-widgetoverlay | Controls the appearance and position of the overlay which grays out the whole page when the address validation pop up is active. |
| .ui-widget | Controls the font and size of text. |
| .ui-widgetcontent | Controls background, border and font colors. |
| .ui-widgetcontent a | Controls the appearance of links (e.g. "[Edit]"). |
| .ui-widgetheader | Controls the appearance of title boxes (e.g. "Verify your address details"). |
| .ui-statedefault | Controls the appearance of buttons (e.g. "Use suggested address"). |
| .ui-statehighlight | Controls the appearance of the message boxes (e.g. "We think that your address may be incorrect or incomplete"). |
The Index Table and Comparison Matrix sections are used by the sample code but are unlikely to be needed in live deployments. In most cases you will not need to edit the Developer or Verification Pop up sections either but these should not be removed from the stylesheet.
